One woman's foray into cooking for herself, for her family, and for her friends. It's not always picture-perfect, sometimes a little messy,
but it's always delicious. Join me in exploring new recipes, savoring the "résultats" and learning from the "erreurs".


Sunday, November 29, 2009

Green Beans with Crispy Pancetta, Mushrooms, and Shallots

When I was younger, everyone seemed to love the green bean casserole with the cream of mushroom soup, topped with the French-fried onions with their turkey dinner.  I still love green beans, but the old stand-by casserole?  Not so much...

Thankfully,  my sister, who's in town for a few days, found an alternative recipe using green beans in one of the recent Fine Cooking magazines.  This takes green beans to whole new heights!  The mushrooms and shallots are a wonderful textural contrast to the still fresh-tasting green beans, and the warm vinaigrette coats the vegetables in additional delicious flavor.  And then we get to top the whole thing with crispy, crumbly pancetta.  The flavor is great, and the colors are beautiful...  THIS is a green bean dish I can get on board with!!!

Green Beans with Crispy Pancetta, Mushrooms, and Shallots
Serves 8

Kosher salt
1-1/2 pounds green beans, trimmed
2-1/2 ounces thinly sliced pancetta (five or six 1/4- to 1/2-inch-thick slices)
3 tablespoons extra virgin olive oil, divided
6 medium cremini mushrooms, trimmed, halved if large, and very thinly sliced
2 medium-large shallots, halved lengthwise and very thinly sliced
1/4 cup very thinly sliced fresh sage leaves
1 tablespoon sherry vinegar
1/2 teaspoon Dijon mustard

Fill a large mixing bowl with ice cubes and water and set aside.  Fill a 6- or 7-quart pot two-thirds full of well-salted water.  Bring the water to a boil, and boil the beans, uncovered, until tender to the bite, 4 to 6 minutes.  Drain, transfer the beans to the bowl of ice water, and let sit until cooled, about 2 minutes. (This completely stops the cooking process and retains the color of the beans.)  Drain and pat dry.

Put the pancetta in a 12-inch nonstick skillet and cook over medium-low heat until crisp and browned, 10 to 12 minutes.  Transfer to a paper towel-lined plate and coarsely crumble.  Remove the pan from the heat and let it cool slightly.

Add 2 tablespoons of olive oil to the pan and return it to medium-high heat.  Add the mushrooms, shallots, and 1/4 teaspoon salt and cook, stirring frequently, until both are nicely browned and shrunken, about 5 minutes.  Add the sage and cook, stirring until fragrant, about 30 seconds.  Take the pan off the heat and add the vinegar, mustard, and the remaining 1 tablespoon oil.  Stir to combine.

Return the pan to medium heat, add the green beans and toss to combine and heat through, 2 to 3 minutes.  Season to taste with salt.  Transfer to a warm serving platter and garnish with the pancetta.

Make ahead:  The beans can be boiled and refrigerated up to 6 hours ahead.  The remaining ingredients can also be prepped up to 6 hours ahead and held in the refrigerator.  An hour before finishing, remove the beans from the refrigerator to come to room temperature.


Source:  Fine Cooking, Oct/Nov 2009


Tuesday, November 24, 2009
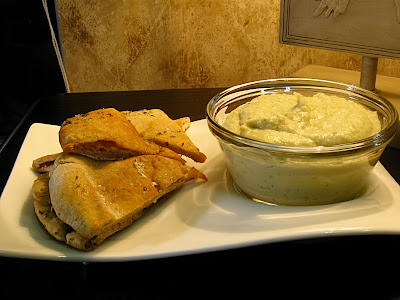
Artichoke-Tuscan Bean Dip & Seasoned Pita Chips

I'm so tired.  I'm getting ready for company this week and the house is getting a top-to-bottom cleaning.  Fortunately for my aging muscles, my sister-in-law, Amy, has done the lion's share of the work.  I don't know what I would have done without her.  Unfortunately for her aching muscles, she has to go home to two little children and a husband to take care of - no rest for the weary!!  I love her dearly - she's such a prize!!

Well, after all that cleaning, I still had to figure out something to eat for dinner.  I wasn't up to making a three-course meal, nor was I up to ordering in.  What to do, what to do...  Scanning the pantry, I spotted a can of organic cannellini beans.  One of my favorite "dips/ spreads" is Giada deLaurentiis' White Bean Dip with Seasoned Pitas.  I didn't have much fresh parsley and the dip needed some more flavor.  My pantry also yielded a small can (7-ounces) of petite artichoke hearts.   Oooh.  An idea!  I added the artichoke hearts to my dip and blitzed away.  Delicious!  The perfect foil for the seasoned pita chips.  And hardly any work!


Artichoke-Tuscan Bean Dip with Seasoned Pita Chips

1 (15-ounce) can cannellini beans, drained and rinsed well
2 cloves of garlic
juice of 1 lemon
1/3 cup extra-virgin olive oil
2 tablespoons chopped fresh parsley
1 (7-ounce) can petite artichoke hearts (or equivalent of standard-sized artichoke hearts)
sea salt and freshly ground pepper, to taste

6 pitas
1/4 cup extra-virgin olive oil
1-1/2 teaspoons sea salt
1 teaspoon dried oregano

Preheat oven to 400 F.

In a food processor, place beans, garlic, lemon juice, and parsley.  With food processor running, drizzle in 1/3 cup olive oil.  Add artichoke hearts and pulse until desired texture is reached. Taste for seasoning, and add salt and pepper accordingly.

Cut pitas in half. Cut each half into half again, then cut quarters in half again, resulting in 8 chips per pita.  Place on baking sheet, drizzle with olive oil, salt, and oregano.  Mix with hands and spread around baking pan in a single layer.  Bake for 12 to 15 minutes, until slightly golden and crisp.  Serve baked pita chips with dip.

Thursday, November 19, 2009

Foodie Friday - Potato Pizza

When my sister went to Florence, Italy several years ago, she told me that one of the most popular pizzas in the area was potato pizza.  Sometimes the potatoes where shredded, sometimes cut in wedges, sometimes diced, sometimes thinly sliced.  It sounded delicious (it's bread and potatoes... what's not to like?!), and while I have ordered it at a couple of restaurants that had it on their menus, I've never made a potato pizza for myself.  Today, while making a batch of French bread, I decided to make one large baguette and a small... wait for it... potato pizza!!  It was extremely delicious.  I wish I would have made more than a small(ish) pizza.  Well, now I know for next time!!

Potato Pizza

Pizza dough, patted into a thin round (I used French bread dough)
1 russet potato, thinly sliced
1/2 an onion, thinly sliced
3 tablespoons olive oil
2 tablespoons fresh rosemary, mincned
1 teaspoon sea salt

Preheat oven to 500 F.

Arrange potato slices in concentric circles over pizza dough.

Mix onion slices, oil, rosemary and salt.  Spread over potatoes.  Place on a baking stone, and bake for 25 to 30 minutes.


Thank you to Michael at Designs by Gollum for hosting Foodie Friday!  Please be sure to visit her site to see all the other wonderful contributions to Foodie Friday!!

Fresh Cranberry Pie


This recipe results in more of a coffee cake than a traditional pie. It's wonderful as a breakfast treat, a snack, or dessert.  My Aunt Joanie gave the recipe to me a few years ago. She's a great cook and has a wealth of wonderful recipes. I'm so glad she shared this one!!

Fresh Cranberry Pie

Preheat oven to 325 F.

In a well buttered pie pan, add:

2 cups washed, whole, fresh cranberries
1/2 cup chopped nuts (I usually use pecans or walnuts, but used flaked almonds this time)
1/3 cup granulated sugar

In a medium-sized bowl, mix:

2 eggs
1 cup granulated sugar
1 scant cup flour
1/8 teaspoon salt
1/2 cup melted butter
1/4 cup oil

Pour egg mixture over ingredients in pie pan. Bake 50 minutes.

Tuesday, November 17, 2009

German Beef Stew

I love beef stew.  My mother makes a wonderful traditional beef stew, with potatoes and peas, etc.  It's really good.  But I found this recipe over 25 years ago and have loved it ever since.  It doesn't replace the traditional, but it's a nice addition to my stew repertoire.  It has grated apple and carrot in it which almost melts into the stew.  Between the apple and carrot and the red wine, this dish has a wonderful intensity of flavor.  The original recipe called for a teaspoon or so of a product called Kitchen Bouquet at the end of cooking, which I found deepened the color of the stew, but not much else, so I've chosen to omit it.

The recipe also calls for serving the stew over noodles that have been sprinkled with poppy seeds.  I generally use store-bought egg noodles, but  I decided to try my hand at making egg noodles myself this time.  I found a nice step-by-step illustrated recipe at About.com showing how to make them.  They turned out well, though I wish I would have rolled them a little thinner.  They were still really good, so I'll definitely make them again!

German Beef Stew

1-1/2 pounds beef stew meat (1-inch cubes)
2 tablespoons cooking oil
1 large apple, pared and grated (approximately 1 cup)
1 medium carrot, grated (approximately 1/2 cup)
1/2 onion, sliced
1 clove garlic, minced
1/2 cup beef stock/ broth
1/3 cup dry red wine
1 small bay leaf
3 sprigs of fresh thyme

4 teaspoons cornstarch
1/4 cup cold water

4 cups medium noodles, cooked and drained
1/4 teaspoon poppy seeds

Brown meat in hot oil. Add apple, carrot, onion, beef stock, wine, garlic, bay leaf and thyme sprigs. Cover and cook over low heat for 2 hours or until beef is tender. Remove bay leaf.


Combine cornstarch and the cold water; add to beef mixture. Cook and stir until thickened. Serve over hot noodles that have been sprinkled with poppy seeds.


Jalapeno-Cheddar Bread


Several years ago, there was a bakery I occasionally shopped that had the most wonderful breads.  On one visit, I noticed they had a jalapeno-cheese bread.  It sounded strange to me, but I was willing to give it a try.  The bakery proprietor suggested that I toast the bread - it would enhance the flavor and the texture.  As soon as I got home, I couldn't wait to try it.  So I cut a slice and toasted away.  And then I buttered it.  O.
M. G.   It was delicious.  Absolutely.  Quite different from any toast I'd ever had.  The bakery is no longer there, and so, sadly, I've had to live without my favorite toasting bread.  Until now.

I regularly make Ann's (Thibeault's Table) French bread recipe, usually about once a week.  A few weeks ago, I decided to add some diced cheddar and chopped jalapeno peppers to the dough in an attempt to duplicate this memorable bread.  It was slightly disappointing.  Not quite enough cheese or peppers, nor were they evenly distributed throughout the loaf.  After a few attempts, I finally came up with what I'd been hunting for - a great loaf of Jalapeno-Cheddar Bread.  Finally!! :-D

Jalapeno-Cheddar French Bread

3-1/2 cups bread flour
1 packet yeast (2-1/2 teaspoons)
2-1/4 teaspoons salt
1-1/3 cups cold water, plus additional 1/3 cup cold water
4 ounces cheddar cheese
2 fresh jalapeno peppers, minced, or 4 tablespoons pickled jalapeno peppers, minced
2 tablespoons grated parmesan cheese (optional)

Place the flour, yeast and salt in the bowl of the food process. Pulse to mix. Add 1-1/3 cups of water and process until the dough comes together. If the dough doesn't form a ball, add a little of the extra water. Process for about 60 seconds, turn off machine and let dough rest for 5 minutes.

Turn on the machine again and rotate the dough about 30 times under the cover, and then remove it to a lightly floured work surface. it should be fairly smooth and quite firm.

Let the dough rest for 2 minutes and then knead roughly and vigourously. The final dough should not stick to your hands as you knead (although it will stick if you pinch and hold a piece); it should be smooth and elastic and, when you hold it up between your hands and stretch it down, it should hold together smoothly.

Preliminary rise - 40 to 60 minutes at around 75°F. Place the dough into a clean dry bowl, (do not grease the bowl), cover with plastic wrap, and set in a warm place free from drafts. (Note the French do not grease the bowl because they believe the dough needs a seat to push up from.) This first rise is sufficient when the dough has definitely started to rise and is about 1-1/2 times its original volume.

Turn the dough onto your lightly floured work surface roughly and firmly pat and push it out into a 14-inch rectangle. Fold one of the long sides over toward the middle, and the other long side over to cover it, making a 3 layer cushion. Repeat the operation. This important step redistributes the yeast throughout the dough, for a strong second rise. Return the dough smooth side up the bowl; cover with plastic wrap and again set to rise.

Final rise in the bowl - about 1 to 1-1/2 hours or longer. The bread should be 2-1/2 to 3 times its original bulk. It is the amount of rise that is important here, not the timing.

Cut the dough in half. Set one piece aside and cover with a towel. On a lightly floured work surface pat the dough into a 14-inch rectangle, squaring it up as evenly as you can. Distribute half of the cheese and the jalapenos and press lightly into dough.  Lengthwise, roll dough up, pinching to seal the long edge and the ends.  Curl the dough around itself, snail-like, pinching the end of the dough to the loaf.  Flatten slightly.  Sprinkle parmesan, if using, over loaf.  Repeat with other half of dough.

Cover with plastic wrap or loosely with a towel and let rise to more than double again at about 75°f.

Place baking stone in oven and preheat oven to 500 F. Place on the hot stone. Immediately toss a number of ice cubes on to the bottom on the oven to create steam. Bake until bread is golden brown and has an interior temp of 200°F. Takes about 20 - 30 minutes.

Sunday, November 15, 2009

Pear Frangipane Tart


I love pears.  I love their flavor, their texture, their juiciness.  I love almonds... their flavor, their texture, their... well,  you get it.  This tart, a Martha Stewart classic, marries these two favorites beautifully.  It's also such a pretty tart, the way the pears are fanned towards the center.  And then MS has us adding dark rum to the filling.  Okay - this tart is really good!  A great dessert for company - so impressive, but not difficult to make.  The recipe makes a 10-inch tart, but the bottom of my 10-inch tart pan is temporarily (I hope!) MIA.  So I made an 8-inch tart.  I didn't downsize the filling, but did use only 3 pears.  It worked fine.

Now, I have to admit something here.  Everytime I've made this tart in the past, I've simmered the pears in MS' wine mixture.  This time... I-I-I compromised... and used... dare I say it... canned pears...  I would be totally ashamed of myself... except the tart turned out delicious!!  *sigh* Good to know that if you don't have the time, or just don't want to mess with, peeling and coring and simmering pears, canned pears will work in a pinch.  You learn something new everyday!!


Pear Frangipane Tart
Makes one 10-inch tart

One unbaked 10-inch pate brisee tart shell, chilled (recipe follows)
1/2 cup unsalted butter
1/2 cup granulated sugar
1 egg
1 cup finely ground blanched almonds (I used natural almond meal this time)
3 tablespoons dark rum
1 teaspoon almond extract
1 tablespoon all-purpose flour
6 white wine poached pears (recipe follows) in 1/2 cup poaching liquid, cooled

Preheat oven to 425 F.

To make the frangipane filling, cream the butter and sugar in the bowl of an electric mixer until light and fluffy.  Add the egg, ground almonds, rum, almond extract, and flour, and beat until smooth. Spread the thick mixture evenly in the chilled tart shell and refrigerate it while you prepare the pears.

Remove the cooled pears from the poaching liquid and cut each in half lengthwise; remove core and stem.  Place each half, cut side down, on a cutting board and cut crosswise into thin slices.  Arrange the sliced pear halves on the frangipane around the edge of the tart, leaving space between each half, and place one half in the center of the tart.  When arranging the pears, try to fan the slices toward the center of the tart, which will elongate the pears somewhat.  Bake for 45 minutes, or until the tart shell is golden brown and the frangipane has puffed and browned.

While the tart is baking, bring the reserved poaching liquid to a boil and reduce by half.  Brush this glaze lightly over the pears immediately upon removing the tart from the oven.  Serve at room temperature.

Pate Brisee
Makes two 8- to 10-inch tarts or single-crust pies, one 8- to 10-inch double-crust pie, or twelve 2-1/2- to 3-inch tartlets

2-1/2 cups all-purpose flour
1 teaspoon salt
1 teaspoon granulated sugar (optional)
1 cup cold, unsalted butter, cut into small pieces
1/4 to 1/2 cup ice water

Put the flour, salt, and sugar in the bowl of a food processor.  All ingredients should be cold.  Add the pieces of butter and process for approximately 10 seconds, or just until the mixture resembles coarse meal.  (To mix by hand, combine the dry ingredients in a large mixing bowl.  Using a pastry blender or two table knives, cut in the butter until the mixture resembles coarse meal.)

Add ice water, drop by drop, through the feed tube with the food processor running, just until the dough holds together without being wet or sticky; do not process more than 30 seconds.  Test the dough by squeezing a small amount together.  If it is crumbly, add a little more water.

Turn dough out onto a lightly floured surface and form dough into a round disk.  Wrap in plastic and chill for at least an hour.

On a lightly floured board, roll out the pastry to a thickness of 1/8 inch. Place the pastry in the tart pan or pie plate, and press it into the bottom edges and along the sides without stretching the dough.  After placing in tart pan, roll over the top of the pan with a rolling pin to cut off overhang of dough.  If placing in pie pan, trim overhang with scissor or sharp knife, leaving about an inch to fold up and crimp around the edge of the pie plate.  Chill the pastry-lined pan until ready to use.


White Wine Poached Pears
1 bottle of Champagne, sparkling white wine, or dry white wine
2 tablespoons freshly squeezed lemon juice
1 cup granulated sugar
1 cinnamon stick
zest of 1 lemon
1/2 vanilla bean
5 firm but ripe Bartlett pears, with stems left on, peeled

Combine all ingredients, except pears, in a large saucepan.  Bring the mixture to a boil and cook for 5 minutes.  Add the pears, lower the heat, and cook for 20 to 30 minutes.  If necessary, turn the pears over gently by rotating the stems with your fingertips so that they cook evenly.  Remove the pears to a bowl, bring the poaching liquid to a rapid boil, and reduce by half.  Pour the syrup over the pears and refrigerate, covered, for at least 6 hours, preferably overnight.


Source:  Martha Stewart's Pies & Tarts, copyright 1985

Saturday, November 14, 2009

Cream of Mushroom Soup


I have to confess something.  When I'm not feeling well, I want cream of mushroom soup.  I mean the stuff that comes in the red and white can.  Growing up, it was always my favorite comfort food... even as an adult, it was my guilty pleasure.  That is, until Ann of Thibeault's Table shared her recipe for real cream of mushroom soup.  It's so good and so easy.  Real sliced and sauteed mushrooms, not those tiny, little gray cubes that come in the canned stuff.  This can be as rich and thick as you want it to be.  Today I kept it a little brothier.  Some crouton or crostini, and I've got a wonderful meal.  I don't even miss the red and white can!!

Cream of Mushroom Soup


3 - 4 tablespoons butter
2 - 3 cups of sliced mushrooms
1 large shallot, minced
1 garlic clove, minced
1 sprig of fresh thyme
4 cups chicken stock/ broth
2 cups milk
1/4 - 1/2 teaspoon dried tarragon, (optional)
salt and pepper, to taste
3 - 4 tablespoons flour, (optional)

Saute sliced mushrooms in butter.  Add shallot, cooking for 2 - 3 minutes, until shallots are tender but not browned.  Add minced garlic and thyme, and cook 1 minute.  Add broth and bring to a boil.  Add milk and simmer for 30 minutes.  Season with salt and pepper to taste and tarragon, if using.  If a thicker soup is desired, mix flour with some milk in a jar, and slowly stir into soup, continuing to cook until soup thickens.  Optional - coarsely puree soup with an immersion blender.


Serves 4


Source:  Ann Thibeault

Friday, November 13, 2009

Gnocchi with Sage Butter


Before I learned how to make gnocchi, I was extremely intimidated by them.  I'd order these little potato dumplings occasionally in Italian restaurants.  (By the way, there are also semolina gnocchi, traditionally circularly shaped.  Can't wait to tackle them sometime!)  Good gnocchi is light and tender.  Bad gnocchi is heavy and/ or mushy... I've had my share of bad gnocchi!  Well, I finally decided I wanted to try my hand at making them about a year or so ago.  After looking up several recipes in books and on the internet, I finally came up with a recipe that always works for me.  They turn out exactly the way they're supposed to.  They're great with a little tomato sauce, or sauteed in an herb-browned butter sauce.

If you like gnocchi, don't be shy about giving these a try!!

Potato Gnocchi

3 russet potatoes
1 egg, beaten
1/2 teaspoon salt
1/4 teaspoon freshly ground black pepper
1/8 teaspoon nutmeg
1-1/2 cups unbleached all-purpose flour

Boil the whole, unpeeled potatoes for approximately 35 minutes, or until the potatoes are tender when pierced.  Drain and let potatoes cool until they can be handled easily.

Mix egg, salt, pepper, and nutmeg.  Set aside.

Once potatoes are cool enough to handle, peel (often you can pull the skin right off the potatoes pretty easily with your fingers).  Put potatoes through a ricer (or push through the holes of a metal colander).  Mix riced potatoes with egg mixture.  Knead in flour, about 1/2 cup at a time.  On a lightly floured surface, knead dough, adding flour a little at a time if necessary, until dough is smooth and no longer sticky.


Divide dough into sixths.  Roll each piece of dough into a long rope, approximately 3/4-inch to 1-inch in diameter.  Cut rope into 1 inch pieces.  On a floured gnocchi paddle or back of a fork, roll each piece down the ridges (or tines) lightly with thumb, until dough curls on itself and is ridged. Place raw gnocchi on a floured surface.  Repeat with rest of dough. 

Bring large pot of salted water to a boil.  Add gnocchi.  When gnocchi float to top of water, continue cooking for another 30 seconds to 1 minute.  Remove from water with slotted spoon.  Serve with sauce or melt butter with sage in skillet over medium-high heat until lightly browned.  Add cooked gnocchi to butter sauce and saute lightly for a minute or so.  Serve with grated Parmigiana-Reggiano.

Thanks to Michael over at Designs by Gollum for hosting Foodie Friday!  Visit her site to see all the wonderful dishes everyone has made this week!! 


Thursday, November 12, 2009

Tablescape Thursday - Golden Autumn


I'm not much of a "yellow" person, but I love the amber yellows of autumn.  The leaves, the fruits and vegetables... They're muted and warm, rich yet mellow.


I bought these plates several years ago from a shop in Duncan, BC (Canada) called Pots and Paraphernalia.  I had seen  similar plates used by Ann of Thibeault's Table, so Ann got the phone number of the store and business was done!  I love these plates!
 

 I found these bowls at Tuesday Morning for a mere 99 cents apiece.  The cream-colored salad plates were also found there for about $1.50 apiece.  I love a bargain!


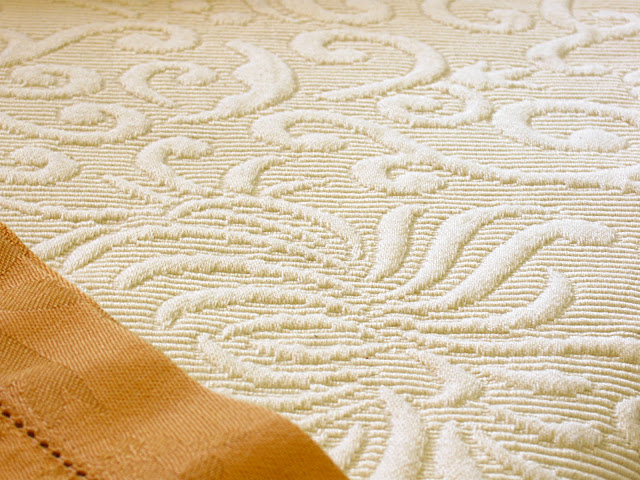
I was so taken by this matelasse tablecloth several years ago, that I bought a second, smaller one for one of my bedside tables.   I believe they came from Horchow's.


The napkins were another Tuesday Morning find.  I was so happy to find a set of napkins to go so well with my Canadian dishes!


Guess where I found this bowl??  I'll give you a hint:  it's initials are "T" and "M"...


I've had these candlesticks for a hundred years...  It was love at first sight!


Besides cooking (and tablescaping!), one of my favorite hobbies is crocheting.  I have so many afghans all over my house!  I thought these afghans, which I made a year or so ago, would look nice draped over the back of a couple of the chairs for this setting.


Many thanks again to Susan of Between Naps On the Porch for hosting Tablescape Thursdays!!  Please visit her site to see the labors of the many inspired (and inspiring!), talented tablescapers!


Tuesday, November 10, 2009

Butter Bits


This recipe came from a wonderful friend of my family who passed away several years ago.  She was a sweet Italian woman, always kind, with an amazingly warm personality.  She gave my mother this recipe when I was a little girl, and they were my favorite cookie for a long time.  Mom would change them up a little sometimes, by placing half of a maraschino cherry or chocolate chips on the top of each cookie before going into the oven.   I'm very sentimental about these little cookies...  My thanks to Kay and to my mom for knowing a great but simple cookie when she sees it!!

Butter Bits


1 cup flour
1/2 cup butter, room temperature
1/4 cup confectioners' sugar
1 teaspoon vanilla extract
pinch of salt

Preheat oven to 375 F.

Mix all ingredients.  Place walnut-sized ball of dough on parchment- or silicone mat-lined baking sheet.  Flatten in criss-cross pattern with floured fork.  Bake for 15 - 18 minutes.  (Mine browned a little too much this time.)

When completely cooled, lightly sprinkle with confectioners's sugar before serving.

Yield:  1 to 1-1/2 dozen cookies

Sunday, November 8, 2009

Asian-Lime Ribs


I love ribs.  It took me a long time to cook them myself, though.  I was very intimidated by them.  I have friends who have smokers just for their ribs.  I have no smoker.  I have friends who have secret recipes for marinating their ribs.  I have no secret recipes for marinating ribs.  What's a rib-loving girl to do??  Knowing I could never grill ribs as well as my friends, I came across a recipe for these Asian-Lime Ribs.  These were different.  They had a very different flavor than any I'd tasted before.  And the recipe is easy to follow and takes the guess work out of cooking ribs.  The sauce is sweet and spicy with an Asian flair.  They're delicious!  In fact, they're now my favorite ribs!


Asian-Lime Ribs


2 racks spareribs, trimmed

Rib Rub:
2 tablespoons ground cinnamon
2 tablespoons kosher salt
2 tablespoons black pepper
1 tablespoon ground cloves
1 tablespoon ground coriander

Asian-Lime Sauce:
3 tablespoons ginger, coarsely chopped
2 tablespoons garlic, coarsely chopped
3/4 cup rice vinegar
1/2 cup low-sodium soy sauce
1/2 cup ketchup
1/2 cup chopped fresh cilantro, chopped
1/3 cup fresh lime juice
1/3 cup brown sugar
1/4 cup hoisin sauce
2 tablespoons dark sesame oil
1 tablespoon crushed red pepper flakes

Dock meat between rib bones for extra flavor.

Combine ingredients for rub, and apply to ribs. Place in pan and cover tightly foil, and refrigerate for 1 hour. Double-check the foil to make sure it fits snugly around the pan. Slow roast the ribs in a 250 F. oven for about 2 hours, checking the ribs after about 1-1/2 hours. (You want the meat to pull away from the bones.)


Stir together ingredients for sauce. Brush on roasted racks of ribs before grilling.

Grill over medium-high heat a total of 15 minutes. Serve ribs with Asian-Lime Sauce.


Source:  Cuisine at Home

Spaghetti & Meatballs

I love Italian food.  Growing up in an area full of Italian-Americans, great Italian food was always readily available.  And since my best friend was/ is Italian, I learned how to make good Italian food!  My mother inherited several great recipes from her friends there and passed them down to me.  While I do like pasta, I love meatballs.  Not just any meatballs but the ones my mom taught me how to make.  I did make one slight change to the recipe, though.  Instead of frying them, I now bake them.  It's my preference, though if you want to fry them, by all means, knock yourself out!

One of the keys to great meatballs is to simmer them in the sauce for at least 30 minutes before serving.  It makes all the difference!  When my daughter started making them, her complaint was that they didn't taste like mine.  First question I asked her:  Did you simmer them in the sauce before serving?  Not realizing how important that was to their flavor and texture, she hadn't.  NOW she makes great meatballs, too!

Meatballs

3/4 pound ground chuck (I often use all ground chuck, or 1/2 pound ground chuck and 1/2 pound ground pork)
1 cup fine dried bread crumbs
1/2 cup grated parmesan cheese
1 tablespoon minced parsley
1 clove garlic, minced
1/2 cup milk
2 eggs, beaten
1-1/2 teaspoons salt
1/8 teaspoon freshly ground black pepper

Preheat oven to 350 F.

Mix all ingredients (I find it's easiest to do with my hands - clean hands, of course!) Shape into balls, a bit bigger than golf balls. I usually get 12 - 15 meatballs out of one batch. Place on parchment-lined baking sheet. (The parchment isn't necessary, but it makes clean-up MUCH easier!)

Bake for 30 minutes. Place in simmering spaghetti sauce for at least 30 minutes before serving.

Saturday, November 7, 2009

Italian Wedding Soup


Italian Wedding Soup. I always thought that it was so called because it was traditionally served at Italian weddings. A little research uncovered that while Italian-American weddings may include it as a favorite part of the menu, the actual origin came from the way the flavors of the dish marry so well together.  My favorite part of Italian Wedding Soup are the tiny little meatballs.  They're so tender from being cooked in the broth, and, in return, they impart such a wonderful flavor to the broth.

A couple of years ago, I tried Rachael Ray's recipe for this soup.  As her recipes promise to be, it's quick and easy.  And though that's not necessarily a prerequisite in my kitchen, it sure is nice when I'm tired but want something healthy and filling.  What a great way to end the week!

Mini-Meatball Soup (Italian Wedding Soup)
Recipe courtesy Rachael Ray

Prep Time: 20 min
Inactive Prep Time: --
Cook Time: 27 min
Level: Easy
Serves: 4 big servings

2 tablespoons extra-virgin olive oil
2 carrots, peeled and chopped
2 ribs celery, chopped
1 medium onion, chopped
2 bay leaves, fresh or dried
Salt and freshly ground black pepper
1 pound ground beef, pork and veal combined (I used 1/2 pound ground sirloin and 1/2 pound ground pork)
1 egg, beaten
2 cloves garlic, minced
1/2 cup grated Parmigiano-Reggiano or Romano, a couple of handfuls
1/2 cup plain bread crumbs, a couple of handfuls
1/2 teaspoon freshly grated or ground nutmeg
6 cups chicken stock or broth
2 cups water
1-1/2 cups dried pasta, rings, broken fettuccini or ditalini (I used orecchiette)
1 pound triple washed fresh spinach, coarsely chopped (I used arugula)

In a deep pot over medium heat add oil, chopped carrots, celery and onions and bay leaves. Season with salt and pepper. Cover pot and cook veggies 5 or 6 minutes, stirring occasionally.

While the veggies cook, combine meat, egg, garlic, grated cheese, bread crumbs, salt, pepper, nutmeg.


Uncover your soup pot and add broth and water to the pot. Increase heat to high and bring soup to a boil. When soup boils, reduce heat a bit and start to roll meat mixture into small balls, dropping them straight into the pot. You are making meat dumplings that will cook in the broth. When you are done rolling the meat, add pasta to the soup and stir. Cover and simmer soup 10 minutes. When pasta is tender, stir in chopped spinach in batches. When spinach has wilted into the soup, the soup is done and ready to serve. Adjust your seasonings.
Blog Widget by LinkWithin