One woman's foray into cooking for herself, for her family, and for her friends. It's not always picture-perfect, sometimes a little messy,
but it's always delicious. Join me in exploring new recipes, savoring the "résultats" and learning from the "erreurs".


Sunday, September 13, 2015

Shrimp Tapas


One of my favorite weekend "dinners" is Ann's (Thibeault's Table) Shrimp Tapas. It's a meal that comes together very quickly, especially if you purchase "easy peel shrimp", shrimp that is already headed and deveined. I picked up a loaf of French bread to serve with, so to heat it up, I turned the oven on to 500 F.
(takes about 15 minutes to heat up to temp), turned the oven off, and placed the loaf in the oven until the shrimp was dished up (5 - 10 minutes). Took the bread out of the oven and cut it up into cubes to sop up that delicious buttery shrimp sauce. Opened a bottle of wine (had a chardonnay on hand), and dinner was done. A nice relaxing evening with a delicious meal. Can't beat that.

Shrimp Tapas

6 tablespoons olive oil
4 cloves of garlic, thinly sliced
1/4 to 1/2 teaspoon red pepper flakes
1 pound medium or large shrimp, peeled and deveined
2 tablespoons chicken broth
2 tablespoons fresh lemon juice
salt
2 tablespoons minced parsley
Italian or French Bread cut into cubes

Heat the oil, garlic and red pepper flakes in a large, shallow pan. When the garlic just begins to turn golden, add the shrimp and cook over high heat for about 3 minutes, stirring constantly. Add the broth and lemon juice.

Pour into a large earthenware bowl and sprinkle with salt and parsley. Serve immediately.


Source:; Thibeault's Table

Wednesday, January 8, 2014

Favorites from All That Splatters

Several of my fellow bloggers are doing, or have done, their top ten posts of 2013. Well, seeing that 2013 was a slow year for All That Splatters, I thought I would come up with the all-time top ten favorite posts of ATS (or what I thought were the top ten favorite posts of ATS). If you disagree with my list, let me know! In no particular order, here we go:

General Tso's Chicken

This delicious chicken dish seems to be a popular dish among Pinteresters. All the ingredients can be found with a trip to your local grocery store. Easy enough to make, a batch of rice rounds out this meal. If you haven't tried it yet, do so. You're going to love it!


Jalapeno-Cheese Bread

Many people shy away from yeast breads. A little flour, a little yeast, a little water, a touch of salt, and a little time is basically all breads need. Need. Hmm. Okay, maybe a little kneading. If you have a heavy-duty stand mixer (like a Kitchenaid), that machine will do most of your kneading. Now, if you are so moved, add something that makes your mouth water. You can add nuts, or dried fruit, or cheese and/or chopped jalapenos. Yum. You've got the makings of the best toast ever. Seriously. Ever. You'll see.

 
Oven-Roasted Cauliflower, Onions & Garlic

I learned a few years ago that if you roast a vegetable, the end-product was like candy. Put a little caramelization on Brussels sprouts, asparagus, eggplant, and I'm a happy girl. Roast some cauliflower with onions and garlic and then finish it off with a tangy little dressing, and I'm in heaven. You will be, too. Trust me on this.


Vanilla Bean Butter-Rum Poundcakes

While my chocoholic sisters and brethren enjoy their addiction to the cacao bean, my craving goes towards the other end of the spectrum. I find the aroma of vanilla heady and intoxicating. And if the dessert menu suggests anything with vanilla bean added to it, I'm done. My decision is cemented. With vanilla bean added to the cake and the sauce, these little cakelets are luscious. Absolutely luscious.


Pulled Pork Sandwich

One would think that pulled pork always needs to start in a smoker. Or a barbeque grill of some sort. Not so. My trusty crockpot came out of retirement for this version and was I ever glad to give this version a shot. The meat comes out juicy and tender and delicious. Top the meat with a little cole slaw, and you've got a memorable sandwich. I'm telling you - get out your crockpot. You won't be sorry.


Scallops with Chili and Honey

Here's an appetizer that's easy and decadent. How often is a recipe described that way? Crispy little wontons, blanketed with sliced green onions (scallions), then layered with juicy scallops that have been caramelized with a bit of a saute and glazed with a sauce of honey and chili. Is your mouth watering yet?


Cloud Souffle

This is a pretty and delicious breakfast dish. It's gorgeous enough for guests, and surprisingly easy enough for treating yourself. Serve with asparagus or toast "soldiers". It's wonderful.


Union Square Cafe Bar Nuts

You're going to want to make these. And when you do, make sure you double the recipe. They are spicy and sweet, salty and slightly herbacious. One tip: when you add the rosemary, make sure you use fresh. A dear friend of mine used dried rosemary - the full amount called for in the recipe. She thought I had gone out of my mind for recommending this recipe. Use fresh rosemary. You will think you had temporarily lost your mind for not making these sooner. Promise.


Italian Open-Faced Sandwich

I came upon the recipe for this open-faced sandwich while watching a PBS cooking show many years ago, long before FoodTV or the Cooking Channel. As I mention in the post, the flavors meld together unbelievably well. You'll be surprised how delicious this is. It's an easy casual week-night, after-work, anytime meal.


Chicken with Garlic & Parsley

This is another dish that brings a lot of people to All That Splatters. The recipe calls for few ingredients, and the whole thing is done in less than 1/2 hour. With all that going for it, you'd think this recipe wouldn't have much flavor. But you'd be wrong. It's full of flavor and quite satisfying. Cook up a little rice or pasta as a side, and dinner is done.


BONUS:  Apple Cake with Caramel Sauce

I love caramel. I think I could eat a shoe if it had caramel sauce drizzled over it. That's not to say that the apple cake isn't good. It's really moist and delicious. The caramel sauce, however, puts it over the top. My mother has been making this recipe since I was a kid. It is a winner.

Saturday, January 4, 2014

Pecan Pie


I'm not ready to start my resolution of healthy eating just yet. Pecan pie is my all-time favorite pie, and this recipe is my all-time favorite recipe for pecan pie. The filling is not syrupy but "stands up" on its own. It's super easy though super decadent. If you are willing to indulge one last time before you begin your regimen of grapefruit and salads, this is a great indulgence.


Pecan Pie

1 cup sugar
1/4 cup unsalted butter, softened
2/3 cup light corn syrup
1 tablespoon flour
1/4 teaspoon salt
3 eggs
1 teaspoon vanilla
1 cup pecan halves

Combine sugar, butter, and corn syrup until smooth. Add flour, salt, and eggs together and stir until smooth. Stir in vanilla and pecans. Bake in unbaked pie shell 1 hour at 350 F.

(Note: Since the pie bakes so long, I make a collar out of foil to cover the edges of the pie crust for the first 45 minutes of baking. Remove the foil and continue baking the remaining 15 minutes.)

Thursday, November 28, 2013

Up For a Cup?

I was contacted recently by Tamara, a representative from Puro coffee.  Never heard of them? Neither had I, but she was ready and willing to introduce this brand to me and my readers. A generous package of coffees, a mini French press and coffee cup arrived shortly. Since Jason, the Director of Creative Services at work, and I often talk coffee, I shared my bounty with him and his family, and the taste-testing began. 

While Jason said he picked up on some of the flavor notes described on the packaging, I was content with the comfort a good cup of coffee brings. The coffee is obviously roasted well, apparently a difficult feat for some companies. While I may not pick up on "citrus-y" or "chocolate-y" flavor notes, I often pick up on the flavor of burnt coffee beans. This does not make for a comforting cup of coffee. 

While I was appreciative of the bounty I received from Puro, the back-story of this company really got my attention. Tamara sent along the following information. It's a bit lengthy, but full of so much great information, I just couldn't decide what to cull it down to. Here is all the info she sent. There are some wonderful links you will definitely want to explore.

Thank you, Tamara. If you were here, I'd invite you in for a cup of coffee. You know it would be a good cup!:


A large number of your coffee drinking readers might not have heard of us before as we don’t have our own cafes and you won’t find us in supermarkets, nevertheless, if they drink coffee, then they will have probably enjoyed ours without realising it was us! Every National Trust site uses our coffee, restaurants like Gourmet Burger Kitchen and The Real Greek, large offices such as Innocent Drinks (the smoothie company), hairdressers like Headmasters and golf clubs like Wentworth all serve our coffee.
Through the Puro brand, alongside Fairtrade, we want to communicate the threat to rainforest and the need to preserve it. After oil, coffee is the second most traded commodity in the world, so imagine the amount of coffee consumed every day all over the world. By putting messages on our cups and sharing our stories and videos with our clients and consumers, we think we can help make a difference. We also want to show other companies that people and planet are just as important as profit. In order to help spread this message, it would be amazing if you were able to embed our short film (4.5mins long) within your review.
http://vimeo.com/fairtradecoffee/our-story or to all of our short films on Vimeo http://vimeo.com/fairtradecoffee
 
http://www.purocoffee.com/us/
Our Facebook page, where we share all our feel good stories and offer a monthly competition to win a gift box just like the one we sent you is http://www.facebook.com/fairtradecoffee
 
Puro Fairtrade Coffee is a brand from a company called Miko who has been roasting coffee in Belgium for 212 years now. It was created in 2005.
 
Miko has 9000m2 of solar panels on the roof of their building to generate their own electricity.
In 2007 whilst some of the Puro Fairtrade Coffee team were trekking through the Puro Ecuadorian Rainforest Reserve, some new species of orchid were discovered. One of these orchids was later named after us http://www.purocoffee.com/uk/saving-rainforest/orchid
In 2008, together with Sir David Attenborough, we launched a webcam in the rainforest to the media
Miko won a business charity award last year for the partnership between Puro Fairtrade Coffee and World Land Trust (we have gone on to help judge the 2013 Business Charity Awards)
Located within Chocó, Colombia. The 124 acre Puro Poison Frog Reserve is the only protected location in the world for the critically endangered and close to extinct Golden Poison Frog. Indigenous tribes still use their poison on their arrows and spears for hunting.
http://purocoffee.com/uk/saving-rainforest/poison-frog

Wednesday, July 4, 2012

Panzanella


(I need to start out by saying the photos here will look much better if you take your glasses off. I'm not sure why I can't seem to take a picture anymore. Lack of practice has a lot to do with it, I'm sure. That and being distracted by the Big Bang Theory rerun that was on tv. I'm rarely home for this show. *sigh* Am I the only one who finally developed an appreciation for this series??)

Back to the dish: I really do love this salad. Evidently it was created to use up a rather tasteless bread. The recipe I based this on has you just tear up the bread. Rather brutish, if you ask me. I prefer to slice Italian or French bread rather thickly, then lightly toast (in the oven or a toaster, your choice). I like the kind of 'crouton-ish' texture of the bread in the salad when it's toasted.

The flavors of the season really come through here. Nice ripe tomatoes, fresh basil, and sweet cucumbers just sing summer. An uncomplicated dressing finishes off the dish. Eat it alone for a light lunch or serve it alongside a simply prepared chicken dish, and Roberto's your uncle. :-)

Panzanella

2 medium to large ripe tomatoes, diced into bite-sized pieces
1 small cucumber, pared and thinly sliced
1 small red onion, thinly sliced
1 cup fresh basil leaves, torn

1/2 cup extra virgin olive oil
3 tablespoons red wine vinegar
salt & pepper to taste

6 - 8 thick slices of French or Italian bread, lightly toasted, cut into bite-sized pieces

Mix vegetables and basil in a bowl. Drizzle olive oil and red wine vinegar over vegetables. Season with salt & pepper, to taste.

Layer half of the bread in bottom of serving dish. Spread half of the vegetables over the bread. Layer rest of the bread over first layer of vegetables, and finish salad with spreading the rest of the vegetables along with rest of the dressing over top of second layer of bread. Cover and rest in refrigerator for 1 hour. Serve immediately.

Sunday, March 11, 2012

Coconut Shrimp Curry

Simple, tasty dishes are a favorite of mine these days. The days of wanting to try my hand at puff pastry from scratch and recipes utilizing every pot and pan in the kitchen, 42 ingredients, and 2-1/2 days of prep time no longer hold the same sheen they once did. So, when I came upon this recipe via a recent stroll through the land of Foodgawker, I was immediately hooked.

Barb's photos at WishfulChef were drool-inspiring. With all the ingredients on hand, my kitchen was soon wafting with the heady aromas of curry, shallots, garlic, and chili powder. And the flavor was comforting and lived up to the anticipation. It was just what I needed on a day when a little Asian comfort food was in order. Thank you, Barb.

Coconut Shrimp Curry
(I tweaked the recipe a little for my tastes, omitting the sweetener used in the original recipe, and halving the milk used in addition to the coconut milk for a little less brothy result.)

coconut or canola oil
1 shallot, thinly sliced
1 garlic clove, finely diced
1 tablespoon curry powder
1 cup potatoes, diced into small cubes
1 small can coconut milk(about 6-8 ounces)
1/2 can of milk (use the empty coconut milk can to measure)
8 ounces shrimp, peeled and deveined
1 medium tomato, diced
1 tablespoon tomato paste
1-2 teaspoons chili powder, or to taste
3/4 cup frozen peas
salt and pepper, to taste

In a large pan, heat oil and add curry powder, cook for about two minutes. Stir in garlic and shallot and cook for a minute. Mix in potatoes, then stir together with coconut milk and regular milk. Add tomatoes, tomato paste, honey and chili powder. Cover and simmer for about 30 minutes, stirring occasionally.

Add shrimp and frozen peas and cook for a few more minutes. Season with salt and pepper to taste. Serve with basmati or brown rice.

Yield: 4 servings

Sunday, March 4, 2012

Kale, Cranberry & Quinoa Salad


In my efforts to eat healthier and explore healthier food options, I came across this recipe. I had heard of quinoa (say keen-wa) before, I'd even bought some that had been sitting in my pantry for quite a while, but I had never cooked it or eaten it anywhere. A little research revealed that this grain contains more protein than any other grain. One website indicates that there are varieties of quinoa that are more than 20 percent protein, making this grain a boon for vegetarians.

And kale. Touted as one of the world's "super foods", kale has risk-lowering benefits for at least five different types of cancers, including cancer of the bladder, breast, colon, ovary, and prostate(1). It comprehensively supports the body's detoxification system. Kale's extremely high vitamin-K content ("one cup of kale provides far more micrograms of vitamin K than any of our 135 World's Healthiest foods"(1)) makes it a champion in anti-inflammatory properties.

Whoa.

But does this all taste good??

In a word, Yes.

I love this dish so much, I've made it at least once a week for the last several weeks. In addition to my dinner, the leftovers heat up beautifully, becoming my lunch for the next couple of days. The toasted pine nuts add a bit of crunch, the dried cranberries give it a touch of sweetness, the sauteed shallots give it a tiny bit of caramelization that I just adore. Don't forget the salt... it definitely needs it. And definitely don't forget to thoroughly rinse the quinoa or your dish will have an awfully bitter aftertaste. You can smell the saponins on the quinoa. You'll know you've rinsed the grain enough - you won't smell the bitter coating at all any longer.

Thanks to Beyond the Plate for this wonderful recipe. I am deeply grateful!


Kale, Cranberry and Quinoa Salad

2 cups water
1 cup quinoa, rinsed and drained
2 ounces/ 56 grams pine nuts
1/2 pound/ 260 grams kale
2 tablespoons olive oil
1 medium shallot (about 2 ounces/50 grams) peeled and thinly sliced
3 ounces/ 85 grams dried cranberries
1 teaspoon chili flakes (optional)
1 teaspoon salt

Combine quinoa and water in a medium saucepan and cook over medium heat until all the water is absorbed, about 15 minutes. Stir the mixture about 10 minutes into cooking to prevent the quinoa from sticking to the bottom of the pot. Set aside.

Toast the pine nuts in a small, dry saute pan over low heat. Watch them carefully so they don't burn. Remove from the heat and reserve.

Remove the stems of the kale, then stack the leaves and thinly slice. Finely chop the stems as well.

Heat the olive oil in a large skillet over moderate heat. Add the shallots and cook until translucent, about 2 minutes. Add the kale and the cranberries, stir, then leave to cook, covered, for about 5 minutes.

Add the pine nuts, chili flakes (if using) and salt, stir and leave to cook again, covered, for another 5 minutes. If the kale starts to stick to the pan, add some water, a tablespoon at a time. (I use a non-stick skillet which eliminates any concern of, um, stickage...)You want just enough moisture to create steam in the skillet, but not too much to give you a sauce.

Toss the kale mixture and quinoa in a medium bowl and serve immediately, or at room temperature. (My personal preference is to serve this warm!)

Wednesday, February 22, 2012

Oaxaca Pizza


My Aunt Joanie is a good cook...no... a GREAT cook! She never steers me wrong when it comes to recipes. And she didn't this time, either. She told me about this simple pizza she makes every Friday night. And while it may be simple to make, it's far from simple in flavor.

Does one need another pizza recipe?? Is there anything original anymore when it comes to pizza? I think so!! At least this was new to me. First, she puts a pint of grape tomatoes in a baking pan, drizzles them with olive oil and adds salt & pepper, puts them in a hot oven (450F - 500F) for 15 - 20 minutes, then sets them aside to cool.


To save herself time (and trouble), my aunt purchases ready-made pizza dough from Central Market (pizza parlors have been known to sell dough very inexpensively, as well). And seriously, I would have purchased pre-made dough as well, but I was house-bound (a self-imposed sentence), so I blitzed up a batch of dough (see recipe below) in my KitchenAid  mixer in less than 10 minutes. I divided the dough into thirds.

Once the dough has risen, place the dough on a piece of parchment and spread out. Drizzle a bit of olive oil over the dough. Transfer the dough onto a pizza stone in a 500F. oven (a pizza peel makes short work of this), and bake for about 8 - 10 minutes.


Now here's the big difference between this pizza and any I've ever had before: oaxaco cheese (say wha-ha-ka).  This Mexican cheese grates similarly to mozzarella but is a bit saltier, more flavorful, which makes this pizza tastier! Spread the grated oaxaca cheese over the baked crust and dot the pizza with the roasted grape tomatoes. Sprinkle grated Parmigiana-Reggiano over the entire pizza and place back into the oven. Bake for about 5 - 8 minutes or until the cheese is bubbly.

Before serving, strew basil cut into a chiffonade over the pizza. It's beautiful and delicious! (I'm sure you noticed the lack of gorgeous greenery over my pizza... )

Really, those roasted grape tomatoes and that wonderful oaxaca cheese... now that's a pizza! Thanks, Aunt Joanie!!

Pizza Crust

4 cups flour
1 tablespoon vital wheat gluten (this really makes a difference in the texture of the dough)
2-1/4 teaspoons dried instant yeast
1-1/2 cup tepid water
3 tablespoons olive oil
1-1/2 teaspoons salt

Mix flour, vital wheat gluten, instant yeast, water and olive oil. If dough does not come together and form a ball, add a bit more water. Let dough rest 10 minutes. Add salt, mix well, and knead for 5 minutes. Place dough in oiled bowl, cover with plastic wrap, and place in draft-free area to rise until double, about 45 minutes to 1 hour.


P.S. I would have posted a few days earlier, but I was electronically stymied. The cord connecting my camera and computer was frayed almost in two! However, we are back in business! Thanks to all for your patience!!

Thursday, February 9, 2012

Where have you been, young lady?!

Good question. Wish I had a good answer...

I did have some medical issues that affected my eating. Which affected my desire to cook. Hence, no posts for over 6 months. BUT things are looking up. And I'm resolved to get cooking again!

I have done a little cooking. I actually baked a potato just the other day! (Let's hear a little woo-hoo from the peanut gallery!) And I've been making a quinoa-and-kale dish that's really good (seriously, it's REALLY good! No, I haven't turned 'treehugger', but I am trying to eat a little healthier...)

So, keep your fingers crossed. If all goes well, I may actually have a recipe post this weekend!!

Thanks to all who have emailed to check on me. Your kind gestures really meant a lot to me!


Lori

Saturday, June 11, 2011

Rigatoni with Broccoli, Garlic & Breadcrumbs

Whenever I visit New York City with my friends and family, we often visit our favorite Italian restaurant there - Carmine's.  The mid-town Manhattan location is always busy, especially with the many Broadway patrons before and after shows.  I've even had the opportunity to bump into some of Broadway's biggest stars (I once saw Patty Lupone!) 

The food is always wonderful and plentiful, just like most Italian homes, whether it's one of their wonderful salads, hot or cold appetizers, delicious meat dishes, or, of course, the many pasta dishes they offer.  One of my daughter's favorites is their Rigatoni with Broccoli, Garlic & Olive Oil which comes sprinkled with toasted breadcrumbs and grated Parmegiana-Reggiano.  It's a delicious non-meat entree that will satisfy even the dedicated carnivores at your dinner table. 


Rigatoni with Broccoli, Garlic & Breadcrumbs
Serves 4

3/4 to 1 pound broccoli florets
1 pound rigatoni
5 tablespoons olive oil
1⁄3 cup dried breadcrumbs
4 - 6 cloves thinly sliced garlic
1⁄4 teaspoon red pepper flakes
1⁄2 cup grated Parmigiana-Reggiano

Bring a large pot of salted water to a boil.Add the broccoli and cook until just tender, about 5 minutes. Remove with a slotted spoon and drain. Set aside.
 
Bring the water back to a boil and add the pasta.While the pasta cooks, heat 2 tablespoons of the olive oil in a large, deep skillet over low heat. Add the bread crumbs, stirring, until the crumbs are toasted a golden brown. Remove the breadcrumbs to a small bowl and set aside.
 
Return the skillet to the heat and add the remaining olive oil, garlic, and pepper flakes.Cook until fragrant, then stir in the broccoli. Stir to coat with the oil as the broccoli reheats, and taste for seasoning.  If pasta is not yet done, keep the heat low to avoid burning the broccoli.
 
Drain the cooked pasta and add it to the broccoli mixture.Cook over high heat for a minute or so to evaporate any water from the pasta, then stir in the bread crumbs and cheese and serve immediately.


Friday, June 10, 2011

"Duffins"

My friend, Marysol, at Memories in the Baking, originally shared the recipe for these little tastes of heaven on an internet cooking forum we both occasionally visit.  "Dirt Bombs" are wonderful muffins dipped in melted butter (sounds good already, right?!), then rolled in cinnamon sugar.  Covered in cinnamon sugar.  Glistening with cinnamon sugar. The coating keeps them moist and, well, irresistible.  My son said they were a cross between a doughnut and a muffin, and so re-named them "Duffins".  Fine by me!  Duffins it is!

Sol's Dirt Bombs
Yields: 12 muffins*

3 cups AP flour, minus 3 tablespoons
1 tablespoon baking powder
1/2 teaspoon salt
1/2 teaspoon ground nutmeg
1/4 teaspoon ground cardamom
3/4 cup (1-1/2 sticks) unsalted butter
1 cup granulated sugar
2 large eggs
1 cup whole milk **

Topping ***
3/4 cups unsalted butter, melted
1/2 cup granulated sugar
1-1/2 teaspoons ground cinnamon

Preheat oven to 400º F. Place the rack in the center position. Generously grease a 12-cup standard muffin pan.

Sift the flour, baking powder, salt, nutmeg and cardamom into a mixing bowl. In another bowl, cream the butter and sugar until light and fluffy. Scrape the bowl down half way through. Mix in the eggs. Add the dry ingredients alternately with the milk in two additions, mixing gently by hand to incorporate all the flour. The batter will be on the stiff side, but airy. Don’t over mix or beat the batter as this will make the muffins tough. Spoon the batter into the prepared pan, without smoothing the tops. Bake for about 25 minutes or until a cake tester inserted in the center comes out clean. As soon as the muffins are cool enough to handle, turn them out onto a wire rack.

Add the melted butter to a bowl. In another bowl, mix the sugar
and cinnamon. Dip the muffins (top, sides and bottom) in the butter, using a pastry brush -if necessary- to cover areas not buttered by dipping. Immediately roll the muffins in the cinnamon sugar mixture. Serve warm or at room temperature.

Sol's notes:
*I've made this twice, and both times, this recipe has yielded 16 muffins instead of 12.
**I substituted whole buttermilk for whole milk because I always have it on hand and prefer it for baking.
*** The amounts listed for the sugar and cinnamon are not quite enough to coat all the muffins, so I recommend you double it.

Saturday, May 21, 2011

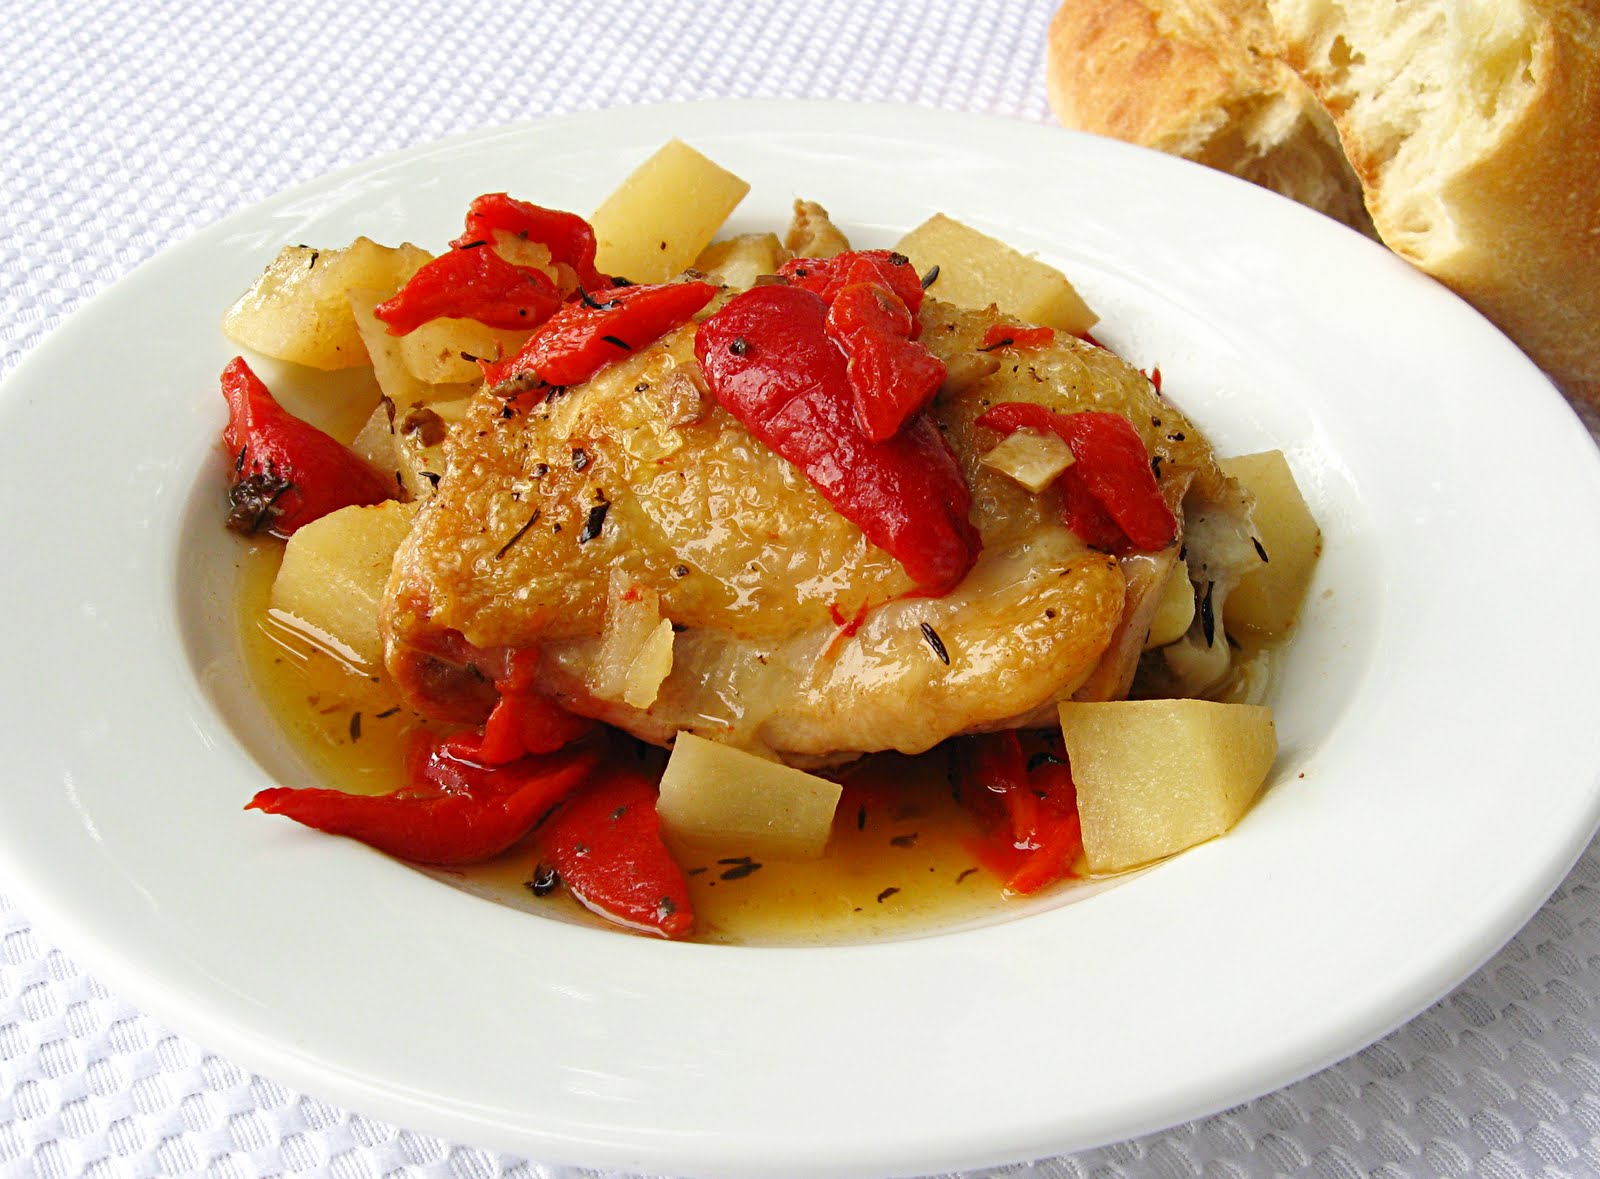
Garlicky Chicken in Red Pepper Sauce

This is another recipe I received in an email from Fine Cooking in their "Make It Tonight" series. It looked really easy, sounded really delicious.  And it was.  Both easy and delicious.  The chicken was so tender and juicy.  The sauce was so flavorful.  And it all came together so quickly.  I love that!  I didn't have fresh thyme on hand, so I substituted about 3/4 teaspoon of dried French thyme.  One other thing - the next time I make this, I will add more potatoes (at least one more, but probably two). Make sure to have a crusty baguette on hand to sop up that amazing sauce. A little starter salad would be a nice addition to round out the meal.

Garlicky Chicken in Red Pepper Sauce
Serves 4

2 Tbs. olive oil
8 bone-in skin-on chicken thighs (about 3 lbs.), trimmed of excess fat and skin
Kosher salt and freshly ground black pepper
6 cloves garlic, smashed
2 tsp. fresh thyme leaves
1 cup lower-salt chicken broth
3 jarred roasted red peppers, drained and cut into 1-inch strips (1-1/2 cups)
1 medium russet potato, peeled and cut into 3/4-inch dice (1-1/2 cups)
1 Tbs. sherry vinegar
Crusty baguette for serving

Position a rack in the center of the oven and heat the oven to 425°F. Heat the oil in a large, oven-proof sauté pan over medium-high heat until it’s shimmering. Sprinkle the chicken with 1-1/2 tsp. salt and 1/2 tsp. pepper. Add half the thighs to the pan, skin side down. Reduce the heat to medium, and cook without touching until the skin browns and easily releases from the pan, about 3 minutes. Turn and cook for 1 minute. Transfer to a large plate. Add the remaining chicken and cook it in the same manner. Transfer the chicken to the plate. Add the garlic and thyme to the pan and cook until the garlic is lightly browned, 2 to 3 minutes. Add the chicken broth, red peppers, potato, and sherry vinegar to the pan, and bring to a boil. Remove from the heat, return the chicken to the pan skin side up, and transfer to the oven.

Braise the chicken, uncovered, until the potato pieces are tender and the chicken is completely cooked through, about 30 minutes.


Source: Fine Cooking

Thursday, May 19, 2011

Tamale Pie


The first cookbook I ever owned as a new bride was Better Homes and Gardens New Cook Book.  I made lots and lots of the recipes contained in that cookbook, many of which remain favorites to this day.  The first few sections introduced me to appliance cooking:  how to use my Crockpot (the Olive Spaghetti Sauce sounds a bit odd but is really good), the Oriental Pork helped familiarize me with my new electric skillet, the Bar-B-Q Meat Loaves (yes, individual meat loaves) made me less intimidated of my little Weber grill.  Coffee cake, Swedish Tea Ring, white bread, pancakes, penuche, Spanish tomato rice (a really tasty rice dish), puddings, pies, roasts, as well as sections on meal planning and ingredient substitutions were the basis of my culinary education.  The pages of BH&G New Cook Book all have the tell-tale splatters of a well-used cookbook in my kitchen.  Admittedly, some of the recipes are dated, but, all in all, I still turn to this cookbook on a fairly regular basis.

In a bit of nostalgia, I decided to look through the book and review some of the recipes I used to make as a novice cook.  The spiral-bound pages are a little worse for wear, but like a neglected grade-school child, one page just fell out of the book as if to say 'Pick me! Pick me!'  The stained page containing the recipe for Tamale Pie floated to the floor, the holes of the page no longer intact to remain in the book of its own accord.

So, Tamale Pie it was.

I actually have a few vivid memories involving this dish.  It was one of the meals I made for my parents when they came from New York to visit their newly married daughter at our first Texas apartment.  Trying to prove to my mother that I could indeed cook, I made this recipe.  Not exactly Beef Wellington, but it came out fine.  Mom and Dad at least feigned approval of my initial cooking abilities.

One time, after simmering the meat and vegetables for the prerequisite 25 minutes, I lifted the pan full of hot ingredients to pour into the casserole dish, and lost my grip.  Hot saucy meat and vegetables went all over the floor of my then-tiny kitchen.  Not pretty.

And I never lift a full pan without making sure I have a good grip on it anymore.  Never.

A couple of changes I made this time (after not making this recipe in easily 15 - 20 years):  I replaced 1/2 teaspoon of the chili powder called for with chipotle chili powder.  It added a wonderful smoky heat to the dish that I really love.  I used a red bell pepper instead of a green pepper (I'm not particularly fond of green peppers...)  The recipe lists a teaspoon of sugar, which I omitted, especially since the red pepper adds its own bit of sweetness.  And I used just a handful of grated Cheddar cheese instead of the 6 ounces used in the original  recipe. (Actually, the original recipe calls for 6 ounces of sharp process American cheese, but I never used processed cheese in the dish.)  The little bit of grated cheese helped bind the meat mixture and was enough for me, but use the whole 6 ounces if it appeals to you.

Retro cooking.  Ya gotta love it!

Tamale Pie
serves 6

1 pound ground chuck
1 cup chopped onion
1 cup chopped red bell pepper
2 8-ounce cans tomato sauce
1-1/2 cups corn (fresh or frozen)
1/2 cup pitted ripe olives, chopped
1 clove garlic, minced
1 teaspoon salt
2-1/2 teaspoons chili powder
1/2 teaspoon chipotle chili powder
Dash black pepper

6 ounces sharp Cheddar cheese, grated

3/4 cup yellow cornmeal
1/2 teaspoon salt
2 cups cold water
1 tablespoon butter

Cook meat, onion, and bell pepper in a large skillet until meat is lightly browned and vegetables are tender.  Stir in tomato sauce, corn, olives, garlic, 1 teaspoon salt, chili powders, and black pepper.  Simmer 20 to 25 minutes or until thick.  Stir in cheese. Turn into a greased 9x9x2-inch baking dish.

Preheat oven to 375 F.

Stir cornmeal and 1/2 teaspoon salt into cold water.  Cook, stirring constantly, until thick.  Add butter, and mix well.  Spoon cornmeal mixture over hot meat mixture.

Bake 40 minutes.


Source:  Better Homes and Gardens New Cook Book, copyright 1968

Monday, May 16, 2011

Southwestern Turkey Wrap


I'm trying to be more frugal these days by taking my lunch to work as often as I can.  Sometimes, that means leftovers if I've cooked something particularly delicious and plentiful (like the General Tso's Chicken of a couple of weeks ago).  But when I happened upon this wrap, it got my attention.  Now, one doesn't normally need a recipe for a wrap. The real recipe here is for the spread that seasons this one.  It's easy, it's delicious, and because of it, definitely takes lunch fare up a notch.  The avocado is optional, but it does add a nice richness and flavor.  Want a satisfying lunch?  Try a Southwestern Turkey Wrap!

Southwestern Turkey Wraps
Makes 4

1/2 cup mayonnaise (not Miracle Whip!)
3 tablespoons chopped cilantro
1 green onion, minced
1 tablespoon minced chipotle
1 teaspoon fresh lime juice

4 10-inch flour tortillas (I've used a sun-dried tomato wrap here)
16 ounces smoked turkey
8 ounces pepper jack cheese
thinly sliced avocado
mesclun (or spring mix salad)
12 thin tomato slices

Spread approximately 2 tablespoons of the chipotle-mayonnaise spread on tortilla. Top with turkey, pepper jack, mesclun, avocado, and tomato slices. Roll fairly tightly, cut diagonally, and serve.


Source:  Contessa's Kitchen

Sunday, April 24, 2011

General Tso's Chicken

While I've seen this dish on the menu of many Chinese restaurants, I've often wondered who was General Tso?  Evidently he was a highly-respected soldier in the Hunan region... a region that appears to have never heard of this recipe.  No matter.  Regardless of the origin of this dish, it is delicious, no matter it's name!  


I came across this version on a wonderful blog called My Adventures in Food.  The recipe is fairly simple, using easily accessible ingredients found in your local grocery store.  And the flavor is outstanding, rivaling any found at your favorite Chinese restaurant.  I'll be making this again and again!

General Tso’s Chicken

1/2 cup hoisin sauce
1/4 cup white vinegar
3 tablespoons soy sauce*
3 tablespoons cornstarch
1-1/2 cups water
1 tablespoon vegetable oil
4 garlic cloves, minced
2 tablespoons fresh ginger, minced**
1/2 teaspoon crushed red pepper flakes

1-1/2 pounds boneless, skinless chicken breasts
3 large egg whites
1-1/2 cups cornstarch
1/2 cup all-purpose flour
1/2 teaspoon baking soda
Vegetable oil for frying

2 green onions, green parts thinly sliced

*I used a light soy sauce.  I found I needed to add about 1/4 - 1/2 teaspoon salt to balance all the flavors.
**I grated the ginger, using a medium-sized Microplane.

To make the sauce, whisk together the hoisin sauce, white vinegar, soy sauce, cornstarch, and water in a bowl. Set aside. Heat oil in a large skillet over medium-high heat. Saute the garlic, ginger, and red pepper flakes until fragrant, about 1 minute. Add the hoisin mixture. Stir until the sauce is dark brown and has thickened. Remove from heat and cover.

Cut chicken into 1-inch chunks. Whisk the egg whites in a shallow dish until foamy. Combine cornstarch, flour, and baking soda in a separate shallow dish. (I whisked the dry ingredients to really blend them.) Toss half the chicken into the foamy egg whites until well-coated, and then dredge the chicken in the cornstarch mixture, making sure all sides are coated. Transfer chicken to a plate and repeat with remaining chicken.

Heat oil in a fryer (or Dutch oven, or a large wok) until it registers 325ºF. Fry the chicken in batches until golden brown, about 3 minutes, turning pieces over halfway through cooking. Transfer cooked chicken to a paper towel-lined baking sheet to drain.

Re-warm the sauce over medium heat until bubbling. Add the chicken pieces and toss to coat. Garnish with sliced green onions.

Tuesday, April 5, 2011

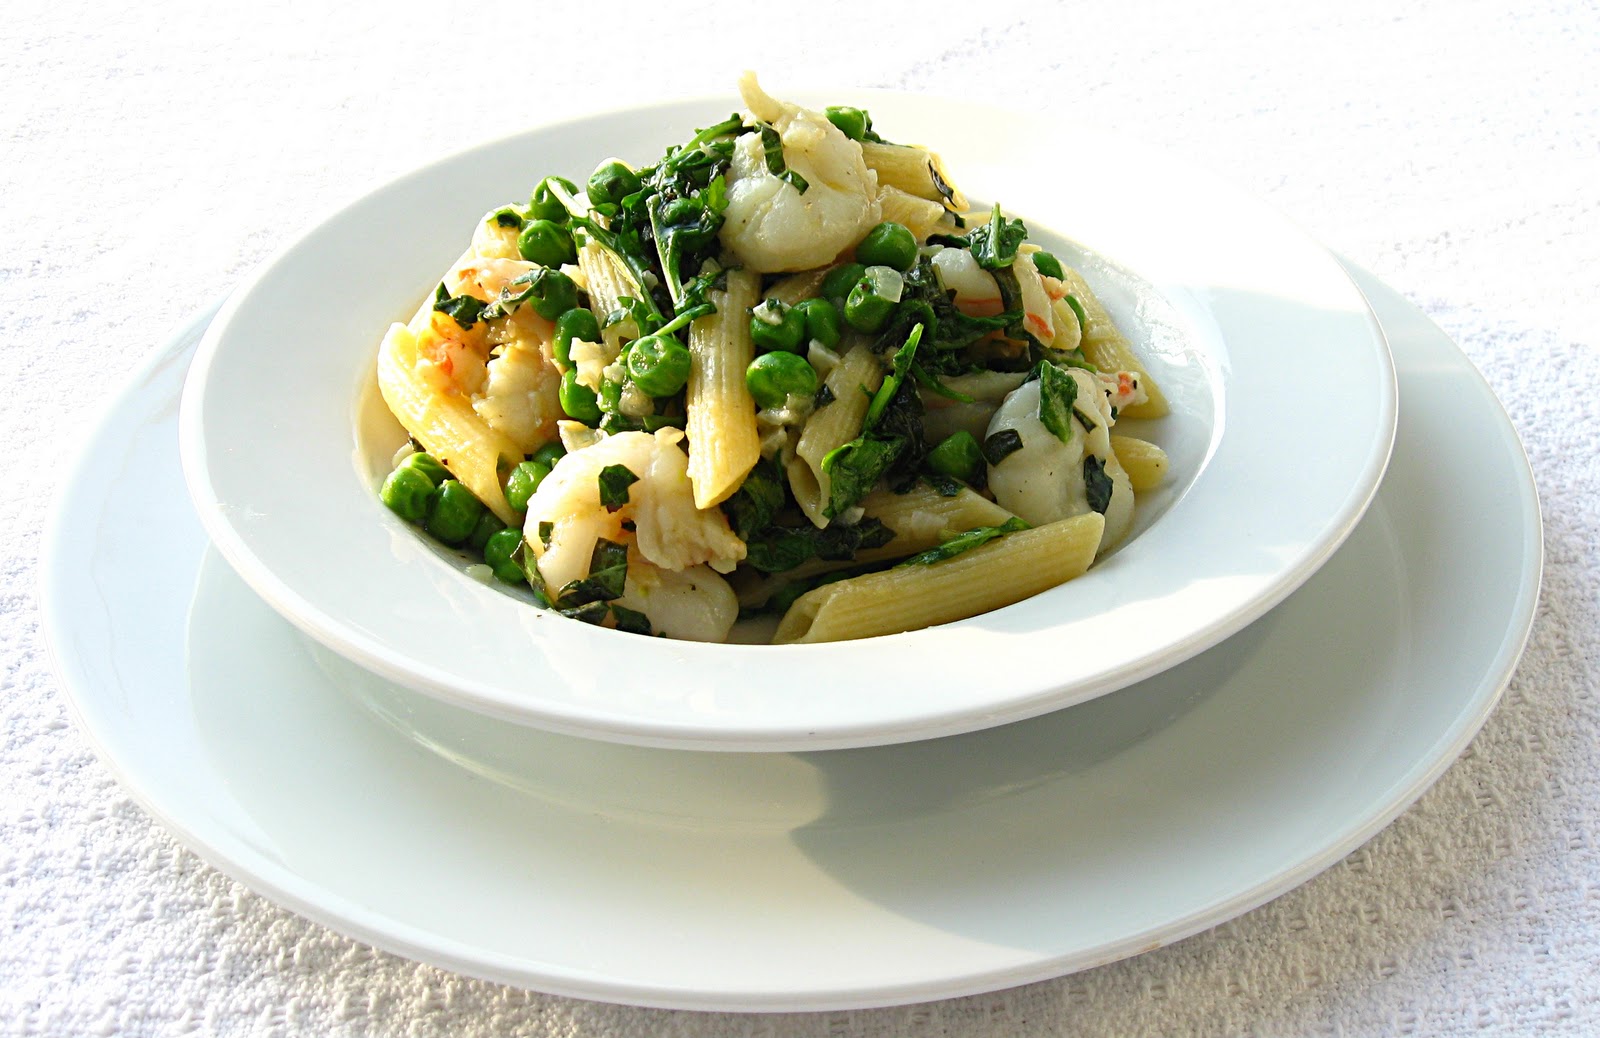
Pea & Shrimp Penne with Basil


I receive daily emails from Fine Cooking magazine's website highlighting a particular recipe, ingredient, technique, etc.  Sunday's recipe, Pea & Shrimp Penne with Basil, definitely appealed to me.  Shrimp, pasta, and basil are a few of my very favorite ingredients, so I was very intrigued.  The subject of the email was "Make It Tonight", and so I complied! The wonderful scent of fresh basil (and lots of it!), along with the minced garlic, serrano pepper, and shallots, was intoxicating.  The finished dish was so flavorful and fresh-tasting.  I will definitely be making this dish again.  Hats off to Fine Cooking!

Pea & Shrimp Penne with Basil
Serves 4

1-1/2 lb. shrimp (21 to 25 per lb.), peeled, deveined, and cut in half lengthwise
1/2 cup chopped fresh basil
5 Tbs. extra-virgin olive oil
1 Tbs. finely grated lemon zest
Kosher salt
1-1/2 cups fresh shelled peas (about 1-1/2 lb. unshelled) or frozen peas
3/4 lb. dried penne
Freshly ground black pepper
1/3 cup finely diced shallots
1 tsp. minced garlic
3/4 tsp. seeded and minced hot fresh chile, such as Thai bird or serrano
2 oz. arugula, trimmed, washed, and dried (about 2 lightly packed cups)

Toss the shrimp with half of the basil, 2 Tbs. of the olive oil, and the lemon zest. Cover and refrigerate for about 30 minutes.

Bring a large pot of well-salted water to a boil over high heat. Put the peas in a large metal sieve and dip them into the boiling water. Cook until just tender, 2 to 4 minutes. Lift the sieve from the water, let the peas drain, and then spread them on a baking sheet in a single layer to cool.

Add the pasta to the boiling water and cook, following the package directions, until al dente. Reserve 1/2 cup of the cooking water and drain the pasta.

Meanwhile, take the shrimp out of the fridge and season them lightly with salt and pepper. Heat the remaining 3 Tbs. oil in a 12-inch skillet over medium heat. Add the shallots, garlic, chile, and a pinch of salt and cook, stirring occasionally, until the shallots are soft and lightly browned, about 2 minutes. Add the shrimp and continue to cook, stirring, until the shrimp have turned pink and are almost cooked through, 2 to 3 minutes. Stir in the peas and remove from the heat.

Return the drained pasta to its pot and add the shrimp mixture and 2 Tbs. of the pasta water. Cook over medium heat until the shrimp are completely cooked through, about 1 minute more. Toss the arugula and the remaining basil into the pasta. Add more pasta water as necessary to keep the pasta moist and continue tossing until the arugula is wilted, about 1 minute. Season to taste with salt and pepper and serve immediately.

Saturday, April 2, 2011

Sweet Potato Oven Fries with Avocado Dip


I've noticed that a lot of hamburger/sandwich restaurants are offering sweet potato fries as an option to the traditional French fried potatoes  This trend has my vote - I love sweet potato fries.  In my humble opinion, they are much more flavorful, look much nicer on the plate, and provide a bit more nutritional value than their paler cousins. I occasionally roast sweet potato wedges and make a little dipping sauce to go with.  But when I saw these sweet potato fries with an avocado dip, I suspected I was on the verge of nirvana.

And I was right.

I discovered this tasty recipe from Katie of the blog, Yum Sugar.  It's such an easy recipe and so delicious.  The avocado dip blitzed up quickly in the mini-food processor.  The sweet potatoes crisped up in about a half-hour in a hot oven.  Doesn't get any easier than that!  Thanks, Katie!

Sweet Potato Oven Fries With Avocado Dip
From Ingrid Hoffmann

2 large sweet potatoes, peeled or unpeeled, cut into 4-inch long and 1/4 to 1/2-inch thick fries
2 tablespoons olive oil, or more as needed
1 teaspoon paprika
1/2 teaspoon chili powder
1/2 teaspoon ground coriander
Coarse ground rock salt and freshly ground black pepper, to taste
Avocado Dip ( recipe follows)

Preheat your oven to 450 degrees F. Line a baking sheet with aluminum foil and set aside.

 
Place the sweet potatoes in a large bowl and toss with olive oil until the sweet potatoes are coated. Add the paprika, chili powder, coriander, salt, and pepper; toss to distribute evenly.

Arrange the coated fries in a single layer on the prepared pan. Bake for 20 minutes on the lower rack until the sweet potatoes soften. Transfer the pan to the upper rack of the oven and bake 10 minutes longer, until fries are crispy. Serve with Avocado Dip.

Serves 6.

Avocado Dip:
1 avocado
1/3 cup mayonnaise
1/3 cup cream cheese
1 jalapeno, seeded and chopped
2 scallions, white and light green part only, chopped
1 lime, juiced
Salt and freshly ground black pepper

Place the avocado, mayonnaise, cream cheese, jalapeno, scallions, and lime juice into a blender or small food processor.

Blend for 1 minute or until you have a smooth paste. Season with salt and pepper, to taste. Serve as a dip for the Sweet Potato Oven Fries.

Source:  http://www.yumsugar.com/Sweet-Potato-Oven-Fries-Avocado-Dip-Recipe-11477639?page=0,0

Saturday, March 26, 2011

Shrimp & Snap Pea Salad with Ginger-Soy Vinaigrette


There is so much to like in this salad.  Quickly cooked tender shrimp, blanched-and-still-crunchy snap peas, juicy cubes of mango, and the Asian flavored dressing with soy, ginger, lime, and a slight pop of heat.  It's seriously good but oh so simple.  It makes for the consummate meal as the weather starts warming up.  The perfect bite contains mango, shrimp, a snap pea, a few bits of chopped roasted cashew, all dressed with that beautiful vinaigrette.  The mere memory of it makes me smile!

Shrimp & Snap Pea Salad with Ginger-Soy Vinaigrette

Serves 4 as a main course

1-1/2 pounds large shrimp (about 32-36 per pound)
2 cups snap peas (about 1/2 pound, trimmed)
3 green onions, trimmed and minced

Ginger-Soy Vinaigrette
1/2 cup extra virgin olive oil
2 tablespoons low-sodium soy sauce
2 tablespoons white vinegar
2 tablespoons fresh lime juice
1 tablespoon grated fresh ginger
1/2 teaspoon honey (my "tweak")
3 - 5 dashes hot sauce

Garnishes
1/2 cup diced mango
1/2 cup chopped roasted cashews
lime wedges

Bring a large pot of salted water to a boil. Add shrimp and cook 3 - 4 minutes, until they turn pink. Drain, run under cold water, peel and devein.

Meanwhile, bring another pot of salted water to a boil, drop in snap peas and boil, uncovered, 2 - 3 minutes, until just tender and still bright green. Drain and rinse immediately with cold water to stop the cooking.

To make vinaigrette: Whisk together olive oil, soy sauce, vinegar, lime juice, ginger, honey, and hot sauce in a small bowl until well-combined.

Put shrimp, snap peas, and green onions in a large bowl, add vinaigrette, and toss well. Divide the mixture among 4 plates and garnish each serving with the diced mango, chopped nuts, and lime wedges.


Source: The Beach House Cookbook, copyright 2005

Blog Widget by LinkWithin