One woman's foray into cooking for herself, for her family, and for her friends. It's not always picture-perfect, sometimes a little messy,
but it's always delicious. Join me in exploring new recipes, savoring the "résultats" and learning from the "erreurs".


Showing posts with label Vegetables. Show all posts

Sunday, March 4, 2012

Kale, Cranberry & Quinoa Salad


In my efforts to eat healthier and explore healthier food options, I came across this recipe. I had heard of quinoa (say keen-wa) before, I'd even bought some that had been sitting in my pantry for quite a while, but I had never cooked it or eaten it anywhere. A little research revealed that this grain contains more protein than any other grain. One website indicates that there are varieties of quinoa that are more than 20 percent protein, making this grain a boon for vegetarians.

And kale. Touted as one of the world's "super foods", kale has risk-lowering benefits for at least five different types of cancers, including cancer of the bladder, breast, colon, ovary, and prostate(1). It comprehensively supports the body's detoxification system. Kale's extremely high vitamin-K content ("one cup of kale provides far more micrograms of vitamin K than any of our 135 World's Healthiest foods"(1)) makes it a champion in anti-inflammatory properties.

Whoa.

But does this all taste good??

In a word, Yes.

I love this dish so much, I've made it at least once a week for the last several weeks. In addition to my dinner, the leftovers heat up beautifully, becoming my lunch for the next couple of days. The toasted pine nuts add a bit of crunch, the dried cranberries give it a touch of sweetness, the sauteed shallots give it a tiny bit of caramelization that I just adore. Don't forget the salt... it definitely needs it. And definitely don't forget to thoroughly rinse the quinoa or your dish will have an awfully bitter aftertaste. You can smell the saponins on the quinoa. You'll know you've rinsed the grain enough - you won't smell the bitter coating at all any longer.

Thanks to Beyond the Plate for this wonderful recipe. I am deeply grateful!


Kale, Cranberry and Quinoa Salad

2 cups water
1 cup quinoa, rinsed and drained
2 ounces/ 56 grams pine nuts
1/2 pound/ 260 grams kale
2 tablespoons olive oil
1 medium shallot (about 2 ounces/50 grams) peeled and thinly sliced
3 ounces/ 85 grams dried cranberries
1 teaspoon chili flakes (optional)
1 teaspoon salt

Combine quinoa and water in a medium saucepan and cook over medium heat until all the water is absorbed, about 15 minutes. Stir the mixture about 10 minutes into cooking to prevent the quinoa from sticking to the bottom of the pot. Set aside.

Toast the pine nuts in a small, dry saute pan over low heat. Watch them carefully so they don't burn. Remove from the heat and reserve.

Remove the stems of the kale, then stack the leaves and thinly slice. Finely chop the stems as well.

Heat the olive oil in a large skillet over moderate heat. Add the shallots and cook until translucent, about 2 minutes. Add the kale and the cranberries, stir, then leave to cook, covered, for about 5 minutes.

Add the pine nuts, chili flakes (if using) and salt, stir and leave to cook again, covered, for another 5 minutes. If the kale starts to stick to the pan, add some water, a tablespoon at a time. (I use a non-stick skillet which eliminates any concern of, um, stickage...)You want just enough moisture to create steam in the skillet, but not too much to give you a sauce.

Toss the kale mixture and quinoa in a medium bowl and serve immediately, or at room temperature. (My personal preference is to serve this warm!)

Saturday, June 11, 2011

Rigatoni with Broccoli, Garlic & Breadcrumbs

Whenever I visit New York City with my friends and family, we often visit our favorite Italian restaurant there - Carmine's.  The mid-town Manhattan location is always busy, especially with the many Broadway patrons before and after shows.  I've even had the opportunity to bump into some of Broadway's biggest stars (I once saw Patty Lupone!) 

The food is always wonderful and plentiful, just like most Italian homes, whether it's one of their wonderful salads, hot or cold appetizers, delicious meat dishes, or, of course, the many pasta dishes they offer.  One of my daughter's favorites is their Rigatoni with Broccoli, Garlic & Olive Oil which comes sprinkled with toasted breadcrumbs and grated Parmegiana-Reggiano.  It's a delicious non-meat entree that will satisfy even the dedicated carnivores at your dinner table. 


Rigatoni with Broccoli, Garlic & Breadcrumbs
Serves 4

3/4 to 1 pound broccoli florets
1 pound rigatoni
5 tablespoons olive oil
1⁄3 cup dried breadcrumbs
4 - 6 cloves thinly sliced garlic
1⁄4 teaspoon red pepper flakes
1⁄2 cup grated Parmigiana-Reggiano

Bring a large pot of salted water to a boil.Add the broccoli and cook until just tender, about 5 minutes. Remove with a slotted spoon and drain. Set aside.
 
Bring the water back to a boil and add the pasta.While the pasta cooks, heat 2 tablespoons of the olive oil in a large, deep skillet over low heat. Add the bread crumbs, stirring, until the crumbs are toasted a golden brown. Remove the breadcrumbs to a small bowl and set aside.
 
Return the skillet to the heat and add the remaining olive oil, garlic, and pepper flakes.Cook until fragrant, then stir in the broccoli. Stir to coat with the oil as the broccoli reheats, and taste for seasoning.  If pasta is not yet done, keep the heat low to avoid burning the broccoli.
 
Drain the cooked pasta and add it to the broccoli mixture.Cook over high heat for a minute or so to evaporate any water from the pasta, then stir in the bread crumbs and cheese and serve immediately.


Tuesday, April 5, 2011

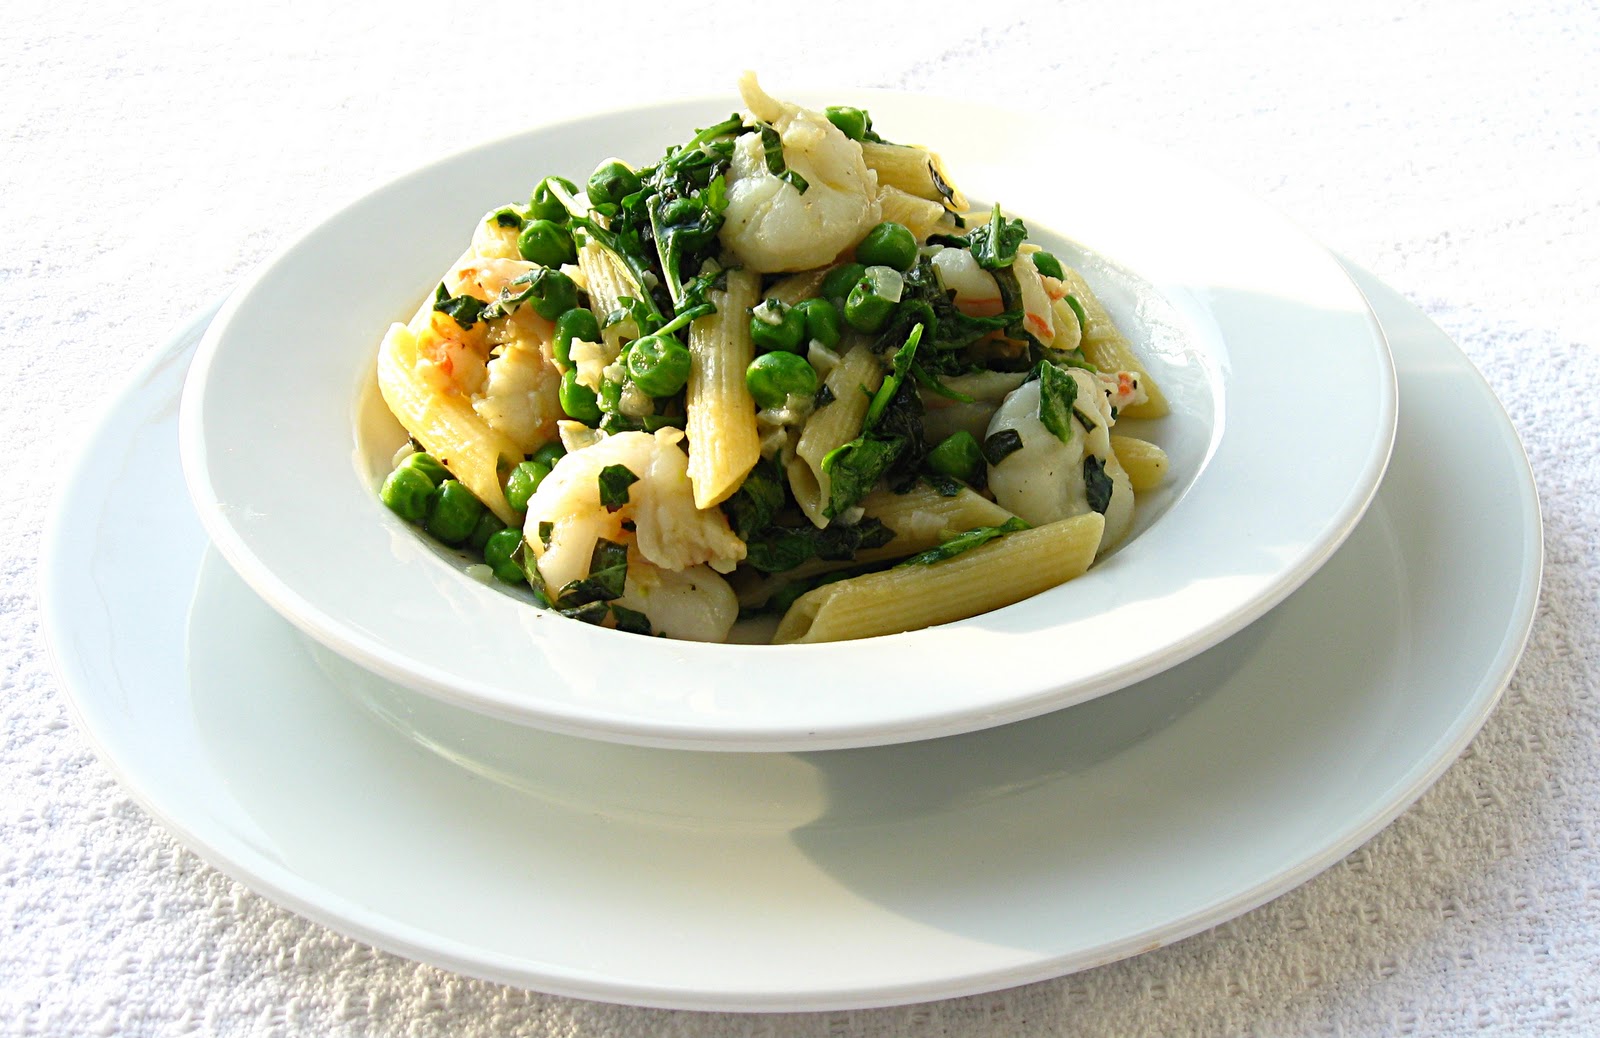
Pea & Shrimp Penne with Basil


I receive daily emails from Fine Cooking magazine's website highlighting a particular recipe, ingredient, technique, etc.  Sunday's recipe, Pea & Shrimp Penne with Basil, definitely appealed to me.  Shrimp, pasta, and basil are a few of my very favorite ingredients, so I was very intrigued.  The subject of the email was "Make It Tonight", and so I complied! The wonderful scent of fresh basil (and lots of it!), along with the minced garlic, serrano pepper, and shallots, was intoxicating.  The finished dish was so flavorful and fresh-tasting.  I will definitely be making this dish again.  Hats off to Fine Cooking!

Pea & Shrimp Penne with Basil
Serves 4

1-1/2 lb. shrimp (21 to 25 per lb.), peeled, deveined, and cut in half lengthwise
1/2 cup chopped fresh basil
5 Tbs. extra-virgin olive oil
1 Tbs. finely grated lemon zest
Kosher salt
1-1/2 cups fresh shelled peas (about 1-1/2 lb. unshelled) or frozen peas
3/4 lb. dried penne
Freshly ground black pepper
1/3 cup finely diced shallots
1 tsp. minced garlic
3/4 tsp. seeded and minced hot fresh chile, such as Thai bird or serrano
2 oz. arugula, trimmed, washed, and dried (about 2 lightly packed cups)

Toss the shrimp with half of the basil, 2 Tbs. of the olive oil, and the lemon zest. Cover and refrigerate for about 30 minutes.

Bring a large pot of well-salted water to a boil over high heat. Put the peas in a large metal sieve and dip them into the boiling water. Cook until just tender, 2 to 4 minutes. Lift the sieve from the water, let the peas drain, and then spread them on a baking sheet in a single layer to cool.

Add the pasta to the boiling water and cook, following the package directions, until al dente. Reserve 1/2 cup of the cooking water and drain the pasta.

Meanwhile, take the shrimp out of the fridge and season them lightly with salt and pepper. Heat the remaining 3 Tbs. oil in a 12-inch skillet over medium heat. Add the shallots, garlic, chile, and a pinch of salt and cook, stirring occasionally, until the shallots are soft and lightly browned, about 2 minutes. Add the shrimp and continue to cook, stirring, until the shrimp have turned pink and are almost cooked through, 2 to 3 minutes. Stir in the peas and remove from the heat.

Return the drained pasta to its pot and add the shrimp mixture and 2 Tbs. of the pasta water. Cook over medium heat until the shrimp are completely cooked through, about 1 minute more. Toss the arugula and the remaining basil into the pasta. Add more pasta water as necessary to keep the pasta moist and continue tossing until the arugula is wilted, about 1 minute. Season to taste with salt and pepper and serve immediately.

Saturday, April 2, 2011

Sweet Potato Oven Fries with Avocado Dip


I've noticed that a lot of hamburger/sandwich restaurants are offering sweet potato fries as an option to the traditional French fried potatoes  This trend has my vote - I love sweet potato fries.  In my humble opinion, they are much more flavorful, look much nicer on the plate, and provide a bit more nutritional value than their paler cousins. I occasionally roast sweet potato wedges and make a little dipping sauce to go with.  But when I saw these sweet potato fries with an avocado dip, I suspected I was on the verge of nirvana.

And I was right.

I discovered this tasty recipe from Katie of the blog, Yum Sugar.  It's such an easy recipe and so delicious.  The avocado dip blitzed up quickly in the mini-food processor.  The sweet potatoes crisped up in about a half-hour in a hot oven.  Doesn't get any easier than that!  Thanks, Katie!

Sweet Potato Oven Fries With Avocado Dip
From Ingrid Hoffmann

2 large sweet potatoes, peeled or unpeeled, cut into 4-inch long and 1/4 to 1/2-inch thick fries
2 tablespoons olive oil, or more as needed
1 teaspoon paprika
1/2 teaspoon chili powder
1/2 teaspoon ground coriander
Coarse ground rock salt and freshly ground black pepper, to taste
Avocado Dip ( recipe follows)

Preheat your oven to 450 degrees F. Line a baking sheet with aluminum foil and set aside.

 
Place the sweet potatoes in a large bowl and toss with olive oil until the sweet potatoes are coated. Add the paprika, chili powder, coriander, salt, and pepper; toss to distribute evenly.

Arrange the coated fries in a single layer on the prepared pan. Bake for 20 minutes on the lower rack until the sweet potatoes soften. Transfer the pan to the upper rack of the oven and bake 10 minutes longer, until fries are crispy. Serve with Avocado Dip.

Serves 6.

Avocado Dip:
1 avocado
1/3 cup mayonnaise
1/3 cup cream cheese
1 jalapeno, seeded and chopped
2 scallions, white and light green part only, chopped
1 lime, juiced
Salt and freshly ground black pepper

Place the avocado, mayonnaise, cream cheese, jalapeno, scallions, and lime juice into a blender or small food processor.

Blend for 1 minute or until you have a smooth paste. Season with salt and pepper, to taste. Serve as a dip for the Sweet Potato Oven Fries.

Source:  http://www.yumsugar.com/Sweet-Potato-Oven-Fries-Avocado-Dip-Recipe-11477639?page=0,0

Sunday, December 19, 2010

Fresh Tagliatelle with Mushrooms, Chestnuts & Sage


Ack.  I had this whole post written and lost it while it was still in "Draft" mode.  Auto-Save is a great feature but can be harsh if you inadvertently lose text (or an entire post) and don't have a chance to recover it before it's automatically saved.  Lesson learned.  If I'm going to save something in Draft before publishing, copy the entire post's HTML code into a text or Word document.  That's my tip for the day!

(An apology is in order here:  My photos this week are particularly poor.  Not sure what my problem is, but I will do my best to get that figured out soon!)

I do so look forward to the weekends.  It not only means leaving the stress of the work week behind, but it allows me the time to do what I really enjoy... cook!  Though I do a little cooking during the week, weekends give me the opportunity to try new recipes and more time-consuming techniques that I don't have the time (or inclination) for after a long work day.  Which brings me to this week's Weekend Blog Showcase, hosted by Ann (Thibeault's Table) this week.

I've had this recipe on file to try for a few weeks now from Take Thou Food. Being the mushroom-lover that I am, I knew it was a dish I would love. Take Thou Food is written by Sean, a young guy who is obviously a talented cook and photographer.  I loved that he made the pasta from scratch for this dish even though the mushrooms are what really take center stage in the recipe.  While Sean used a rolling pin to roll out his pasta dough, though, I used my handy, dandy crank pasta machine.  I felt like a bit of a slacker in comparison, especially given the fact that his dough looks remarkably uniform and mine, well, ... doesn't.  Nonetheless, his pasta dough was simple enough to make and will be my go-to pasta dough recipe from now on.

Sean used a combination of shiitake, oyster, button and rehydrated chanterelles in his dish, which sounded delicious.  I remembered a small bag of dried lobster mushrooms I've had stashed in my pantry for quite some time, waiting for a dish where they would really star.  So I reconstituted them in some hot water for about 30 minutes, and sliced them up along with some shiitakes and baby bellas, saving some of their steeping liquid to enhance the dish.  Perfect.

I also had a jar of roasted chestnuts on hand.  Their slightly sweet flavor and soft yet chewy texture were a wonderful addition to the recipe.This dish was so easy and so delicious, I know it will be one I will make again and again.  Thank you, Sean!

Fresh Tagliatelle (Mushroom, Chestnuts, Sage) 
Inspired by Gabby's Fettucini from La Pietra Cucina

- mixture of wild mushrooms
- 2+ tablespoons of butter
- a bunch of sage, chiffonade
- roasted chestnuts, in little pieces
- dried or fresh fettucini or tagliatelle
- 1 tablespoon of fresh lemon juice

1) Make the pasta. This is so easy and simple to make at home. Just combine 100g of flour, 1 large egg and a tablespoon of olive oil and blitz until it resembles wet sand. Pour out to a lightly floured work surface and knead for a couple minutes until smooth and elastic. Wrap in cling film and chill for 30 minutes.

2) After the pasta's chilled, roll it out using a rolling pin (not recommended) or a pasta machine. After it's thin enough, cut into tagliatelle and set aside until you need it.

3) In a hot pan, add a tablespoon of olive oil (Lori's note:  I added an additional 2 tablespoons of butter to the olive oil). Add the mushrooms (rehydrate any dry mushrooms per package instructions) and saute until it starts to brown and reduce in size. Finish off with a tablespoon of butter to give it a nice, rich, nutty flavor.

4) Add in sage a minute before the mushrooms finish cooking.

5) This is where you gotta multitask: if you're using fresh pasta, cook it in salted, boiling water for 1 to 2 minutes before the mushrooms finish cooking. If you're using dried pasta, you want to cook it just before al dente and by the time the mushrooms finish cooking so about the same time you start sauteeing the mushrooms. Overcooking the mushrooms is more forgivable than mushy pasta though.

6) Add a splash of the mushroom stock from the liquid the dried mushrooms were in and squeeze about a tablespoon of lemon juice over the pan.

7) Toss in your pasta with the chestnut bits and toss a few times until well incorporated.

8) Finish the pasta with another tablespoon of butter and mix. Serve immediately.

Wednesday, November 17, 2010

Eggplant & Garlic Salad


When I have a chance to put my feet up for a little bit, I often find myself trolling the food photo sites like Tastespotting and Foodgawker, oohing and aahing over many of the beautiful culinary creations, the gorgeous photography, and the inspiration to expand my own recipe repertoire.  This simple but unbelievably delicious recipe is a result of one of those trolling sessions.

Eralda, of The Split Pea fame, posted this recipe from her parents' native Albania.  As a fellow eggplant-lover, I was anxious to give it a try.

I was unable to locate any Chinese eggplants at my local grocer's but was able to locate some slender Italian aubergines.  Perfectly acceptable!  I bought two but one sufficed for my meal.

While Eralda leaves her garlic totally raw, I decided not to mince mine quite so fine, putting the garlic along with the olive oil called for in the dressing into a small ramekin and microwaving the mixture for about 30 seconds.  It was just enough to take the "bite" out of the garlic, leaving it a bit softer and mellower.  Heating the oil a bit with the garlic also pleasantly flavored the olive oil.

This is a delicious salad and I will be making it often. Thank you, Eralda!

Eggplant and Garlic Salad

6-7 small Chinese eggplants (or 2 slender Italian eggplant)
3 tablespoons whole wheat or unbleached flour
1/2 teaspoon salt
1/2 teaspoon black pepper
2 tablespoons canola oil for frying
1 medium garlic clove, very finely chopped
1 tablespoon extra virgin olive oil for drizzling
1 teaspoon red wine vinegar
1/2 teaspoon salt for sprinkling the salad (Eralda used fleur de sel, so I did, too.  Perfection!)

Wash, remove ends, and slice the eggplants lengthwise (1/4 inch). Mix the flour, salt, and pepper into a dish or pie plate.  Heat the canola oil in a large skillet. Toss the eggplant slices in the flour mixture.

When the oil is hot, add the eggplant slices in on layer. Cook on high heat (the higher the temperature of the oil the less oil they will absorbe) until brown on each side, about 1 minute or less per side.  To test for doneness, pierce with a fork. If the fork is easily inserted, the eggplant is done.

Remove eggplant from heat and drain on paper towels. Arrange on a plate, sprinkle with the garlic*, salt, and drizzle with the olive oil and the vinegar.

*Alternatively, put the minced garlic and olive oil in a ramekin and microwave for 20 - 30 seconds.  Remove from microwave and whisk in the red wine vinegar.  Season the cooked eggplant with salt & pepper, and drizzle the garlic, olive oil & red wine vinegar dressing over the plated eggplant.

Wednesday, November 10, 2010

Potato & Celery Soup


I've finally begun to realize that soup can be an easy thing.  It doesn't always mean caramelizing or roasting vegetables long and slowly or simmering away for hours on the stove.  It can mean a quick saute, a little simmering, a little pureeing, and then voila - good eats.  Monique, of La Table de Nana fame, has been a wonderful teacher in this regards.  All the recipes she shares are wonderful.  Many are great yet uncomplicated recipes with huge flavor.  And the recipe for Potato & Celery Soup is no exception.  I'd never had a celery soup before, but her (always) beautiful photos took me in.  And so I tried it.

More and more, I'm allowing myself to cook with what is on hand instead of having to run to the store for every ingredient, so I made a couple of substitutions.  With no onions on hand (an unbelievable oversight on my part), I did happen to have two generously-sized shallots.  Additionally, I  normally would have used  a russet potato in the soup, but alas, no russets on hand, so I used 2 smallish red potatoes, leaving their skin on.  The vegetables sauteed and simmered away in the water called for in the recipe until nice and tender.  After pureeing, the soup needed just a little more liquid for thinning out.  Since I had an opened bottle of white wine, that's what I added to the soup.  It was wonderful!

Now, I have no doubt, none whatsoever, that the recipe made as written was delicious.  So, if you have all the ingredients on hand, by all means, try it that way.  But don't be intimidated by the need for substitutions.  You never know what culinary concoction you come up with!!

Thank you, once again, Monique!

Potato & Celery Soup
(Serves 1 generously)

2 sticks celery, cut into small chunks
1 small yellow onion, diced (I used 2 large shallots)
1 floury potato, cut into small chunks
1 cup water (I used about 1-1/2 cups of water)
1/2 to 1 cup stock (I used about 1/4 to 1/3 cup of white wine)
Knob of butter
Croutons* (optional)
About 1 tbsp grated parmesan cheese (optional)
Parsley optional)

In a saucepan, heat up a knob of butter. Fry onions until they begin to sweat. Add in celery and potato and cook for 2 to 3 minutes.

Pour in water and allow to simmer over a low-medium flame until the vegetables have cooked through and softened. The water would have been reduced considerably. Use a hand held-blender to mash everything into a smooth puree.

(If you do not have a hand-held blender, use a traditional blender (turn off the fire when you do this, obviously). Be careful, as the lids of blenders can get blown off by the hot steam. After you get a smooth puree, return it to the saucepan, on a low flame.

Add stock according to how thick or thinned out you want your soup to be. I added slightly less than 1 cup.

Add 1 tbsp grated parmesan cheese. This imparts a nice salty flavour. :) I did not need to add salt at all.

Top with croutons, or plain toasted bread. Sprinkle parsley before serving.


*I made croutons from leftover challah bread:  Cut into cubes, toss with a little olive oil, then bake in a 400 F. oven for about 10 - 15 minutes, until croutons are golden, turning a couple of times during the cooking.

Wednesday, November 3, 2010

French Onion Soup


When the weather is blistering, cold soups, like gazpacho and fruit soups are refreshing and the perfect light meal.  But when the temperatures start to drop, my thoughts turn toward heartier fare.  I make a mental list of all the wonderful soups I want to make.  Clam chowder and potato soup.  Squash soups.  And this one.  French Onion Soup.  It took me a moment, but I realized I've never made French Onion Soup before.  I often order this soup when I'm out, but why I've never cooked up a batch myself escapes me!

Of course, my first foray into French Onion Soup making meant I had to follow the master:  Julia Child.  Julia has you sweat the onions for about 10 minutes, then caramelize them, creating a rich depth of flavor in the soup.  Now we all know how much Mrs. Child loved her butter. And, truth be told, so do I.  But I have to admit that I found the call for 1/2 cup of butter to cook the onions in a bit much.  I didn't question the recipe when first making it but made a note that the recipe could easily reduce the amount of butter by half and still be delicious.

And then I realized she said 1/2 stick of butter.   Duh.  Thankfully, I had used a bit more onion than the recipe called for.  But, of course, the soup was still a bit... shall we say, buttery.  Overnight in the fridge rendered the excess butter easy to remove.  *whew*

As I've been guilty of doing a bit lately, I thought I had some beef stock in the pantry and was mistaken.  Thankfully, I did have chicken stock, and after perusing a few other recipes online, decided that it would make a decent substitution. Since the recipe also calls for a a glug of Cognac and a cup of white wine, as well as a long (1-1/2 hours) simmer, I knew the soup would definitely develop a great flavor.  And it did.  The flavor is obviously a little different but still very good.

A crouton made from some homemade French bread, along with a healthy sprinkling of grated Gruyere, and a run under the broiler produced the very soup I was craving.  Ah.  Thank you once again, Julia!


French Onion Soup

1/2 stick butter (4 tablespoons)
1 tablespoon olive oil
8 cups thinly sliced onions (about 2-1/2 pounds)
1/2 teaspoon salt
1/2 teaspoon sugar
1 tablespoon flour
8 cups homemade beef stock, or good quality store bought stock (or chicken stock, in a pinch)
1/4 cup Cognac, or other good brandy
1 cup dry white wine
8 (1/2-inch) thick slices of French bread, toasted
3/4 pound coarsely grated Gruyere

Heat a heavy saucepan over moderate heat with the butter and oil. When the butter has melted, stir in the onions, cover, and cook slowly until tender and translucent, about 10 minutes. Blend in the salt and sugar, increase the heat to medium high, and let the onions brown, stirring frequently until they are a dark walnut color, 25 to 30 minutes.

Sprinkle the flour and cook slowly, stirring, for another 3 to 4 minutes. Remove from heat, let cool a moment, then whisk in 2 cups of hot stock. When well blended, bring to the simmer, adding the rest of the stock, Cognac, and wine. Cover loosely, and simmer very slowly 1 1/2 hours, adding a little water if the liquid reduces too much. Taste for seasoning


Divide the soup among 4 ovenproof bowls. Arrange toast on top of soup and sprinkle generously with grated cheese. Place bowls on a cookie sheet and place under a preheated broiler until cheese melts and forms a crust over the tops of the bowls. Serve immediately.

Thursday, October 28, 2010

Creamy Polenta and Mushrooms

When I saw Ann's (Thibeault's Table) mushrooms over polenta a few weeks ago, I knew that was something I would love.  I have had sauteed mushrooms before, and I have had polenta before but never combined as a main course.  Following Ann's techniques, I ended up with a meal that left me sighing over its memory for hours after.

For the creamy polenta, I used a ratio of 4:1 liquid to fine cornmeal.  Wanting the flavor of the polenta to still shine through, I used a base of half chicken stock, half water.  The liquid was brought to a simmer, lightly salted, and the cornmeal was whisked in in a steady stream.  Added too quickly, the polenta will clump up.  Once the polenta had thickened up, I whisked in a nob of butter.  The consistency was perfect.

To top the polenta, I used a mixture of baby Bellas and button mushrooms, sliced thickly and sauteed in butter.  Once in the pan, I left the mushrooms alone - no stirring for several minutes - to let them saute and caramelize.  At that point, I stirred them, seasoning with salt and pepper and finely sliced sage leaves.  To create a sauce, I added Marsala to the pan (about 1/4 cup), let that reduce to an almost syrup-y state, then stirred in about 1/4 cup of chicken stock and let that reduce a bit until it was nice and thick.  The sauce was also finished off with a small nob of butter.

This would make an excellent side dish to a roast beef or even a roasted chicken.  But it also made for an amazing meatless main dish.  Of course, for it to be truly vegetarian, a vegetable stock could be substituted for the chicken stock.  So delicious!  Thank you for the inspiration, Ann!


* * * * * * * * * *

Click on Foodie Friday logo to go to Designs by Gollum

Thank you once again to Michael for hosting Foodie Friday! Please join me in drooling over the dishes of all the other participants!!

Tuesday, October 26, 2010

Butternut Squash and Cannellini Bean Soup with Bacon


I came across this soup on Epicurious.com, one of my very favorite places!   I love butternut squash and was happy to find another soup recipe using one of my favorite ingredients.  While the recipe directions have you dicing the squash and boiling it in the stock, many of the reviewers indicated that they had roasted the squash first before adding it to the soup.  I decided to halve the squash, drizzle the halves with extra virgin olive oil and seasoning with salt & pepper, then roasting in a 450 F. oven for 1/2 hour.  I then scooped out the roasted squash flesh into the stock.  I also decided to puree the soup save for 1 of the cans of cannellini beans, which I added back to the pureed soup and cooking long enough to heat them through.  By the way, I also rinsed all the cannellini beans - adding all that starchy, sodium-ridden liquid was not all that appealing to me.  I was very happy with the result.  Delicious!  Here is my version of this soup:

Butternut Squash and Cannellini Bean Soup with Bacon

2 thick bacon slices, chopped
1-1/2 cups chopped onion
6 garlic cloves, minced
3 cups low-salt chicken broth
1 butternut squash (about 1-3/4 pounds)
3 15-ounce cans cannellini (white kidney beans), drained & rinsed,divided
14-1/2-ounce can diced tomatoes in juice, drained
1 teaspoon chopped fresh rosemary

Preheat oven to 450 F.

Halve the butternut squash lengthwise.  Place skin-side down on baking sheet.  Drizzle with extra virgin olive oil and season with salt & pepper.  Roast for 30 minutes, or until squash starts to take on some caramelization.  Remove from oven and set aside until cool enough to handle.

Sauté bacon in heavy large pot over medium heat until crisp, about 4 minutes. Transfer to paper towels to drain. Add chopped onion and garlic to drippings in pot; sauté until golden, about 10 minutes. Add chicken broth; bring to boil.

Separate roasted butternut squash from skin and transfer to soup pot.  Add 2 cans cannellini, drained tomatoes, and fresh rosemary. Cover and simmer until flavors blend, about 10 minutes. Puree soup with stick blender (or, alternatively, puree in blender in batches.  Return to soup pot.)  Add remaining can of drained cannellini beans.  Season soup with salt and pepper. (Bacon and soup can be made 1 day ahead. Wrap and chill bacon. Chill soup uncovered until cold, then cover and keep refrigerated. Rewarm bacon and soup separately before serving.)

Ladle soup into bowls. Garnish with chopped bacon and serve.

Saturday, October 16, 2010

Weekend Blog Showcase - Rosemary Tomato Tarts


It's the third edition of Weekend Blog Showcase -- moving right along!  Please join Ann (Thibeault's Table) and me in showcasing recipes from around the food blog world. Please see the text at the end of this post to learn more about the Weekend Blog Showcase and how you can participate, too!

The recipe I decided on for this weekend comes from DandySugar.  Lisa's photography is stunning (I'm always so in awe of great photography - check out her photos for her Cherry Peach Almond Crisps!), as are her wonderful recipes.  Lisa says she was introduced to cooking via a hand-me-down aqua-colored Easy Bake Oven... I had that same oven, only mine was brand new (showing my age!), and experienced the same  spark.  Ah - a kindred spirit!


I've had Lisa's recipe for her Rosemary Tomato Tarts bookmarked for quite some time now, and since I had everything on hand, this was my chosen recipe for this week's Showcase.  And am I ever glad I finally made these.  So easy, so utterly delicious.

I ended up making four 4-inch tarts using tart pans with removable bottoms.  After realizing I hadn't eaten all day, I easily downed two of these babies for dinner!  I will be making these again and again.  The filling was delicious, the crust extremely flaky.  Thank you, Lisa, for a wonderful recipe I will happily add to my own repertoire!!

Rosemary Tomato Tarts
For three 5-inch tarts or one 9-inch (I made four 4-inch tarts)

Savory Tart Crust
1-1/4 cups of all purpose flour
1/2 cup (1 stick) of butter (very, very cold and cubed) (I used frozen butter and cut it into little pieces with a heavy chef's knife)
1/4 teaspoon palm sugar (I didn't have palm sugar so used regular granulated sugar)
1/4 teaspoon kosher salt
2 teaspoons chopped fresh rosemary
1-3 tablespoons ice cold water (I ended up using 5 tablespoons)

In a food processor, combine flour, salt, sugar and rosemary. Pulse 1 - 2 times until just incorporated. Add the butter cubes and pulse until mixture resembles course meal about the size of a pea. Add water a tablespoon at a time and pulse only until mixture just comes together. Test by squeezing a pinch of dough. If it sticks together it’s done.

Place dough on a lightly floured surface. Form into a disk shapes, flour all sides, and wrap well with plastic. (If making small tarts, separate dough into thirds or fourths and wrap each individually.) Refrigerate for at least 1 hour up to 24 hours. When you are ready to roll out, make sure to let dough come to room temperature for about 10-15 minutes before rolling out.

Preheat oven to 350 when you are ready to make your tarts.

Rosemary Tomato Filling
3 - 4 tomatoes (I used one large beefsteak tomato)
2 tablespoon olive oil
1 onion, sliced into thin strips
2 cloves of garlic, minced
1 tablespoon fresh rosemary, chopped
goat cheese
juice of 1/2 lemon

Heat olive oil in a skillet. Saute onions for about 5 minutes until they are translucent. Add the garlic and stir until fragrant. Add the rosemary and stir. Add the lemon juice and stir. Remove from heat.

Roll out your dough into rounds and place each round into a tart shell. Carefully press dough into shell and cut off excess to use for another tart if necessary. Poke holes in the bottom of shells and evenly distribute the onion mixture in each shell, following with a sprinkling of goat cheese. Arrange tomato slices on top. Add a very light drizzle of olive oil and top with chopped fresh rosemary.

Bake for 25-30 minutes depending on your oven. Let cool for 10 minutes.  (I sprinkled a little coarse sea salt on the tarts before serving - perfect!)

* * * * * * * * * *

Please join Ann and me for Weekend Blog Showcase.  To participate, make a recipe from a blog other than your own and post about it, giving credit to the blog you've borrowed the recipe from.  Put the WBS logo on your post and sign in to Mr. Linky. That's all there is to it!

Thursday, September 23, 2010

Artichoke & Hollandaise


I love artichokes.  Their flavor can be an acquired taste, and to tell you the truth, I was not nearly as captivated by them when first introduced to this member of the thistle family.  But it wasn't long before addiction set in.  The flavor is not only wonderful, but there's something very 'cool' about scraping the leaves through your teeth.  It's one of those vegetables that makes you wonder about the first brave soul to figure out that such pleasure existed in this odd and somewhat intimidating-looking plant.  However, by far my favorite part of this vegetable is the heart.  It's definitely worth all the work excavating through the leaves to find.

My favorite way to enjoy artichokes is stuffed with flavored bread crumbs and served with a lemon-butter sauce.  But like the many other foodies who were compelled to break out their personal copies of Mastering the Art of French Cooking after watching the movie Julie and Julia, I had to try Julia Child's suggestion of enjoying a steamed or boiled artichoke with Hollandaise sauce on the side.  And while I'm sure Ms. Child would frown upon my shortcut blender Hollandaise, I cannot taste a difference (or enough of one, anyway) between my blender version and the stand-in-front-of-the-stove-and-stir-butter-til-your-arm-falls-off version.

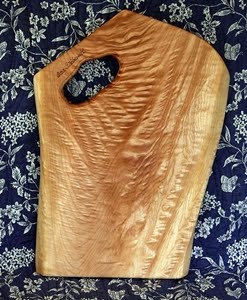
As a bit of an aside, take a gander at the beautiful board my dinner is resting on.  It's one of Ann's (The Maple Cutting  Board Gallery).  I love the design in the wood, the beautiful edge of the board.  Now that Ann and her husband are creating these boards themselves, I'm going to have a difficult time reining in my wish to add to my collection.  I imagine that is going to be a futile endeavor...

Artichoke with Hollandaise Sauce

4 large artichokes
lemon
Hollandaise Sauce (recipe follows)

Trim artichokes by cutting off the stem so that the artichoke will sit flat and steady.  Cut off about 3/4- to 1-inch of top of artichoke.  If desired, snip tips of large outer leaves.  Rub cut edges with cut lemon to prevent browning.

Bring a large pot of salted water to a boil (should be large enough so that boiling water will cover artichokes).  Carefully drop artichokes into boiling water, cover, and cook for 45 minutes - 1 hour.  To test for doneness, tug at one of the bottom outer leaves.  It will come out easily when artichoke is fully cooked.  When done, remove with tongs and drain.  Serve with Hollandaise sauce.


Hollandaise Sauce
3 egg yolks
2 tablespoons fresh lemon juice
1/4 teaspoon salt
Dash hot pepper sauce
1/2 cup butter, melted and bubbling

Add egg yolks, lemon juice, salt and hot pepper sauce to blender, and blend about 5 seconds. With blender running, and partially covering top, pour in bubbling butter in a steady stream. Blend until thickened, about 30 seconds. Serve immediately.

Yield: 3/4 cup

Source: GE appliance recipe, copyright 1978


* * * * * * * * * *

Click on Foodie Friday logo to visit Designs by Gollum


Please visit Designs by Gollum to see everyone's contributions to Foodie Friday this week!

Friday, May 21, 2010

Saturday Blog Showcase #20 - Gazpacho

It's Week #20 for Saturday Blog Showcase.  Join Ann (Thibeault's Table) and me in featuring recipes from our fellow bloggers.  Look at the bottom of this post for guidelines to join in on the fun!

This week, I visited Budget Bytes, a wonderful blog devoted to eating well without breaking the family budget.  Beth's recipes are broken down cost-wise and into easy-to-follow steps.  Her gazpacho looked delicious and I was not disappointed.  Even using canned crushed tomatoes, the tomatillos, fresh cilantro and parsley, and fresh lime juice really brightened the flavor.   It was so easy to put together after work - a slight bit of chopping and blitz the rest in the blender.  A wonderful cold soup as the Texas temperatures start creeping upwards.  Thank you, Beth!

Summer Gazpacho

1 (28-ounces) can crushed tomatoes
2 cups vegetable juice (like V8)
1 small yellow onion
1 large cucumber
2 small tomatillos
1/4 bunch Italian parsley
1/4 bunch cilantro
2 cloves garlic
1 tablespoon olive oil
1 teaspoon salt
freshly ground black pepper, to taste
1 medium lime, juiced
1 medium avocado

Wash, seed and finely dice the cucumber, tomatillo and yellow onion. Split the chopped veggies into two bowls. Half will be pureed with the other soup ingredients and the other half will be added at the end for texture.

In a blender combine the crushed tomatoes, half of the chopped veggies, the minced garlic, parsley, cilantro, olive oil, lemon, salt, pepper and half of the V8. If all of the V8 will fit in your blender, go ahead and add all of it but don't let the liquid exceed 3/4 of the blender's volume. Puree these ingredients on a fairly low setting until almost smooth. Taste and adjust the salt and pepper to your liking.

Pour the contents of the blender into a bowl and stir in the remaining chopped veggies and remaining V8 juice. Dice the avocado and either sprinkle on just before serving or stir into the soup. If you stir it in, the acid from the tomatoes and lemon will keep it from browning. Let the soup chill for at least 30 minutes to blend the flavors. Serve cold!


* * * * * * * * * *


To participate in Saturday Blog Showcase:

1.Make a recipe from a fellow blogger's website and share the recipe on your blog with a link back to the blog where you found the recipe.

2.Add the Saturday Blog Showcase logo to your post.

3.On Friday night or Saturday, link your post to Mr. Linky:

Sunday, May 2, 2010

Roast Chicken & Basil Smashed Potatoes


Sunday afternoon.  The morning cloudiness and drizzle cleared and it's turned out to be a beautiful day. And the perfect Sunday evening meal is a roast chicken dinner.  I prefer the high heat method of roasting.  The chicken always turns out juicy and tender. 

Of course, potatoes and gravy are a must when roasting a chicken.  I had some red potatoes I quartered and boiled with a couple of cloves of garlic.  When the potatoes were cooked, I drained them, smashed them with milk and butter, salt and plenty of freshly ground black pepper, then stirred in a handful of chopped fresh basil. Delicious!  And plenty of leftovers for tomorrow.  Yay!

Sunday, April 4, 2010

Seared Scallops, Carrot Fritters and a Yoghurt Dressing


I love scallops.  When you can find fresh ones, their sweetness and texture is beyond compare.  And one of my favorite ways to prepare them is with this recipe.  It's one I came across several years ago, though for some reason I don't make it as often as I should.  The three elements of this dish come together to form one spectacular flavor combination: the unusual carrot fritters with their Indian spices, the sweet, caramelized scallops, and the tangy yogurt dressing.  This makes for a wonderful appetizer or even a light meal.  Try it - you won't be sorry!!

Seared Scallops, Carrot Fritters and a Yoghurt Dressing
12 medium-sized scallops, intestinal tract removed
2 tablespoons olive oil
sea salt
freshly ground black pepper


to serve
carrot fritters (below)
yoghurt dressing (below)
watercress


Place the scallops in a bowl, add the olive oil, season with salt and pepper and stir to combine. Heat a non-stick frying pan over a medium to high heat and cook the scallops for 1 minute each side.


Place 3 carrot fritters on a plate, top with the watercress and scallops and drizzle with the yoghurt dressing. Season with pepper. Serves 4.
 

Carrot Fritters
1/2 cup all-purpose flour
1/2 cup club soda
1 egg, lightly beaten
1/4 teaspoon ground cumin
1/4 teaspoon ground coriander
1/4 teaspoon turmeric
1 teaspoon superfine sugar
1 teaspooon sea salt
1 small red chili, seeded and finely chopped
1-1/2 cups grated carrot
8 green onions (scallions), finely sliced
1/2 cup chopped cilantro
1/4 cup vegetable oil


Preheat the oven to 315 F. Place the flour, club soda, egg, cumin, coriander, turmeric, sugar and salt in a bowl and mix well. Add the chili, carrot, green onions, and cilantro and stir to combine. Heat a frying pan on a mdium to high heat, add the oil and heat until hot. Cooking in batches, add 2 tablespoons of batter per fritter and cook for 2 minutes each side, or until golden brown. Drain on paper towels. Cook teh remaining fritter batter, adding extra olive oil if necessary. Place the fritters on an ovenproof plate lined with paper towels and keep warm in the oven while you cook the scallops. 


Yoghurt Dressing
1/2 cup plain yoghurt
1 tablespoon lime juice
sea salt
freshly ground black pepper
1 tablespoon olive oil
Place all the ingredients in a bowl and whisk.

Source:  Bill Granger's Bill's Open Kitchen (copyright 2003)
Blog Widget by LinkWithin